Showing posts with label red velvet. Show all posts

Sunday

Hummingbird Bakery's Red Velvet Cupcakes

I had a go-to red velvet recipe, one I thought I was happy to use for the rest of my life... but then I went to London last October, bought a red velvet cupcake from the Hummingbird Bakery on Portobello... realised I have their recipe book at home, decided to try it and have not turned back since. Their cream cheese frosting recipe is also the one I've been using for years now, so it truly is a perfect pairing!


There were many birthdays in my family this week, and a special one in the manfriend's family... and also I kinda had a craving for a red velvet cupcake (clean eating begins MONDAY!). So, following a terribly self-indulgent Saturday morning, I decided to whip up a few batches of these little babies.

Don't they look pretty? My baby boomer dad surprised me by splitting the cupcake in half and eating it like a cupcake sandwich. Who knew he subscribes to Lifehack pinterest board advice?


Anyway, for those of you still on the hunt for the perfect red velvet cupcake recipe, look no further. The Hummingbird Bakery's recipe is definitely the way to go.

Red Velvet Cupcake
Yield: 12 cupcakes
  • 60g unsalted butter, at room temperature
  • 150g caster sugar
  • 1 egg
  • 20g cocoa powder
  • 30ml red food colouring
  • 1 tsp vanilla extract
  • 120ml buttermilk
  • 150g all purpose flour
  • 1/2 tsp baking soda
  • 1 1/2 tsp white vinegar
  1. Preheat the oven to 180°C and prepare your cupcake liners
  2. Cream the butter and sugar in a large mixing bowl until fluffy, then add the egg and beat until fluffy
  3. In a small bowl, mix the cocoa powder, red food colouring, and vanilla into a thick paste then add it to the butter mixture, beating well to incorporate
  4. Add half the flour, beating until just combined, then add all the buttermilk, mixing well before adding the rest of the flour
  5. Last step, add the baking soda and vinegar and beat until just combined before dividing the batter into the cupcake liners. Fill the liners 2/3 of the way up, then lower the oven temperature to 165°C and bake for 25 minutes
  6. Allow the cupcakes to cool for 5 minutes into the cupcake tins before removing to a wire rack to cool completely. You may, like my brother and boyfriend, prefer to eat these without frosting... but for the purists who believe that red velvet cake must be eaten with cream cheese frosting, decorate as you will with this cream cheese frosting. I used a Wilton 1M tip to decorate with these darling little swirls. 

Saturday

Cheesecake, Oreos, Red Velvet, and me

I go through these phases of voluntary solitary confinement every few years, the last one being when I was doing my A levels. I had gone the entire summer holiday between AS and A2 not calling a single friend, read an average of 20 books a week, watched SO much tv, and spent most of those three months cooped up in my room, playing on SnitchSeeker. That was a bit drastic, and yet, when the semester began, I just picked up where I left off with my friends (them knowing me far too well) and re-entered "reality".
It seems as if I may have hit the hermit stage again. Not that I don't want to see my friends - I do - but it's rather the fact that I sort of really enjoy my own company and doing what I like to do, which unfortunately are mostly... activities that you do alone (reading, internet surfing, watching tv, baking, fangirling One Direction, etc), and only a certain set of people (usually us internet nerds) enjoy... 
My preferred form of socialising these days are confined to places where I can hear my friends speak so that I may actually have quality time with them, where the lights are steady and do not come with a disclaimer for causing epileptic shock, and where I can be home with enough time to still have a conversation with my family before I start getting ready for bed. 
I think it's just a side-effect of growing older. Meh. 
Anyway, despite all this, I was quite looking forward to catching up with some friends and colleagues at a Bistro in town last night. Had even washed my hair, applied concealer and blush, and put on a fresh outfit! But my dad called, saying him and mum had to go for some networking thing, and needed me to pick up my siblings and grandma at my aunt's in town. Now... I'm not one to say no to my father, even though I explained to him that I had made plans, and that these instructions would disrupt everything. We tried to find an alternative, but in the end, suffice to say, I scrubbed my face clean and changed into PJs. 
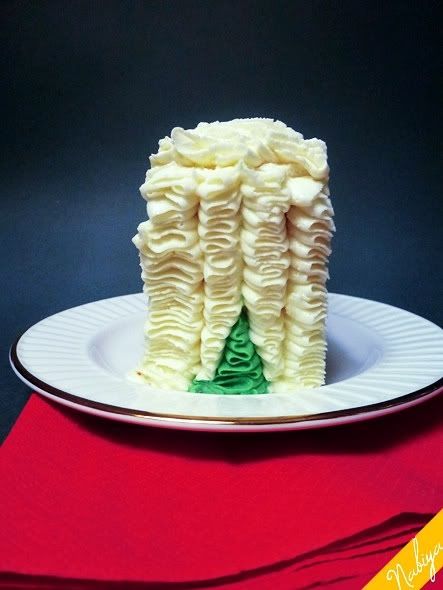
To then soothe my grumpy mood at having one of my rare nights out disrupted, I decided to attempt this recipe that I have been dying to try for a few weeks now. I had initially planned on baking it as a round cake for my parents on Valentine's Day, but that didn't happen, so this time I decided to bake it in a square pan... as I liked the cheesecake bar concept I did for the Berry Cheesecake Bars previously. 
So for those of you who are staying in this weekend, why don't you try this recipe out and see if it helps to improve your mood as much as it did with me?
Photobucket
Red Velvet Cheesecake Recipe
Adapted from Willow Bird Baking
Biscuit Base
  • 24 Oreos, processed or stuffed-in-a-ziploc-bag-and-smashed-with-a-rolling-pin into crumbs
  • 5 1/2 tbsp butter, melted and cooled
  1. Preheat the oven to 160C and grease and line your baking pan with butter and parchment paper
  2. Combine the crumbs and butter, then pour into the pan. Press down with the bottom of a glass for an even and firm base
  3. Bake for 10 minutes, then remove from the oven and set aside
Chocolate Ganache (x2)
  • 2oz bittersweet chocolate, finely chopped
  • 1/4 cup heavy whipping cream
  • 2 tbsp confectioners sugar
  1. Combine all ingredients in a bowl and microwave on full heat for roughly 20 seconds, take it out and stir to mix properly
  2. Pour the ganache over the biscuit base, leveling with a spoon, then put it in the freezer for at least 30 minutes
Cheesecake Filling
  • 24oz cream cheese, softened
  • 1 cup caster sugar
  • 1 1/2 tbsp all purpose flour
  • 2 tsp vanilla extract
  • 3 large eggs
  1. Beat the cream cheese and sugar in a large mixing bowl until light and fluffy
  2. Add the flour, beat and scrape side of bowl as necessary, then add the vanilla
  3. Beat in the eggs one at a time
  4. Pour the filling over the biscuit and ganache base in the pan, then bake for 35-45 minutes, or the middle just jiggles gently when the tin is shaken
  5. Cool at room temperature for 30 minutes to an hour, then chill in the fridge for at least 3 hours to set
Red Velvet Cake
  • 1/4 cup vegetable shortening
  • 1 egg
  • 3/4 cups sugar
  • 1 tablespoon cocoa
  • 1 ounce red food colouring 
  • 1/4 teaspoon salt
  • 1/2 teaspoon vanilla
  • 1/2 cup buttermilk
  • 1 1/4 cups flour
  • 1/2 teaspoon baking soda
  • 1/2 tablespoon distilled white vinegar
  1. Preheat the oven to 180C, butter and line the pan with parchment paper for ease of removing later
  2. Cream the shortening, egg and sugar until fluffy
  3. In a small bowl, mix the cocoa and colouring into a paste, then mix this into the shortening mixture
  4. Beat in the salt and vanilla, scraping the side of the mixing bowl as necessary to ensure all current ingredients have been mixed evenly
  5. Add the flour and buttermilk, alternating so that you begin with adding flour, then buttermilk, and end with flour
  6. Combine baking soda and vinegar in a small bowl and fold into the batter 
  7. Pour into prepared pan and bake for 30 minutes, or until a skewer poked through the cake at an angle comes out clean. Allow to cool completely on a cooling rack
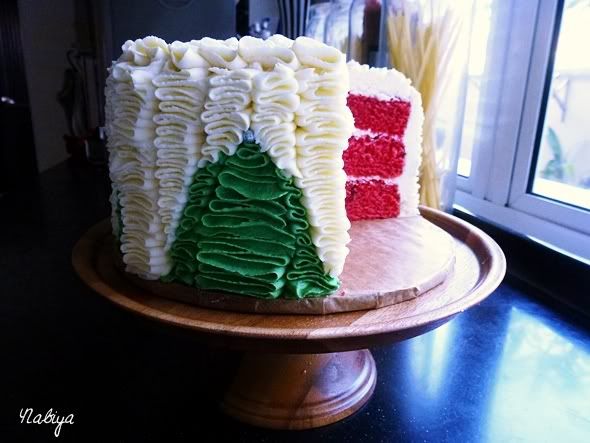
Photobucket
Assembling the cake
The biscuit base, ganache layer, and cheesecake should already be in one pan. Carefully remove from the pan, and place on a cake board or serving platter. Apply another layer of chocolate ganache over the top of the cheesecake, then place the red velvet cake top-side-down on top of the cheesecake. Cut with a long serrated knife as necessary to ensure the sides match up. 
Optional: Drizzle with remaining ganache
Photobucket
I didn't add too much ganache or cream cheese frosting (as indicated in Willow Bird Baking's recipe) as this cake is far too rich on its own. But that's your prerogative! 
Much love,
Nabs

Thursday

Red Velvet baked Doughnuts


It's February, you're starting to see lots of red and pink hearts on sale everywhere, tv promo slots are filled with lovey dovey messages and reminders to get that special someone a gift from the heart, and you want to gag. Says the single girl.

I have never had a special someone on Valentine's Day, which is fine with me as it means I don't need to worry about gifts and an expensive dinner for two at a fancy restaurant. Valentine's for the past few years for me have always meant family dinner, flowers for my mother, and cuddles with my siblings while watching Ever After and The Little Mermaid.

However, I do love desserts, and we do always still get lots of Valentine's treats from friends! So this year, I'm baking red velvet doughnuts for everyone! I finally caved and bought a Wilton doughnut pan last week, it looked so cute, you see? I've been thinking of getting one ever since I saw this picture on tumblr roughly a year ago, but it's quite difficult to get one here, and when you do find one... it's quite expensive. But I had a bit of extra holiday money, so why not, right?

We had some relatives around last Tuesday afternoon, for a tea party of sorts, and since it was my baking day anyway, I thought I'd get up a little early and work on some treats for the guests. It's a damned shame that I only have one doughnut pan, as it means waiting for several batches, and enduring the pain of standing for quite a bit of time.

Red Velvet doughnuts
Yield: 8 doughnuts, I made 3 batches

  • 1 cup all purpose flour
  • 1 1/2 tsp baking powder
  • 2 tbsp cocoa powder, sifted
  • 1/4 tsp salt
  • 1/3 cup caster sugar
  • 2 large eggs, lightly beaten
  • 1/3 cup plain greek yoghurt
  • 3 tbsp butter, melted
  • 1 tsp vanilla extract
  • 2 tsp water
  • 1/4 tsp red food colouring


  1. Preheat oven to 180C, butter the doughnut pan and set aside
  2. Combine all the dry ingredients in your large mixing bowl
  3. Mix in the sugar
  4. Add the eggs and yoghurt, beat on low-medium until just incorporated, gradually adding in the water as you go
  5. Beat in the butter and vanilla extract, then finally stir in the colouring
  6. Pour the batter into a piping bag, or I used one of these, and fill the doughnut pans 2/3 of the way
  7. Bake for 10-12 minutes, take them out, let them cool in the pan for up to 5 minutes before overturning onto a wire rack. Cool completely.

Cream Cheese icing glaze

  • 4oz butter, softened
  • 4oz cream cheese, softened
  • 2 1/2 cups sifted confectioners sugar
  • 1 tsp vanilla extract


  1. Cream the butter and cream cheese until light and fluffy
  2. Gradually add the sugar, beating the whole time so it gets evenly incorporated into the mix
  3. Add the vanilla extract, continue to beat until completely mixed
  4. Transfer the frosting into a medium sized bowl, and microwave for about 15 seconds, until the mixture is runny. Then just whisk it lightly with a fork before overturning the doughnuts into the "glaze". Allow this to cool to room temperature, or chill if you prefer a harder glaze. 

Serve with coffee or tea!

I can't recall where I got this recipe from, and I looked through all my recent browsing but can't find it. If anybody knows, please poke me and I'll put in the proper credit. Sorry for the fuss!
Love, Nabs

Third time's the charm


Sometimes it just seems like all your stars are lined up to make every single thing you touch go wrong, and during those times, the only way to face it is to laugh, walk away, watch an episode or two of Grey's Anatomy (so it becomes apparent that someone else has even bigger problems than you do) and take a nap before getting back to the task at hand.

I had an order from a friend for her brother's birthday cake last weekend, and it took me THREE attempts to finally get it right. The first time I made it, the cakes fell apart when I tried to turn them out of the pans. The second time... I forgot to add sugar.

YUCK.

I remember wondering "Why does the batter look so odd?" and then peeking into the oven to check on progress, "Why is it rising all weird and lumpy?"

See, this is why we always taste the batter before pouring. ALWAYS. I think I didn't that time because I had just gone through the horror of the first batch, and just wanted to get it over and done with.

Needless to say, I tossed the second batch in the bin immediately.

My mum stopped by in the kitchen to find me slumped over the counter, an I-can't-believe-I-did-something-so-stupid look on my face, and the ingredients all around me. It was 2 in the morning. She made me pack up, get some rest, and try again in the morning. Which was great advice. Thanks, mum!

Hopped out of bed the next morning around 8, fresh-faced and ready to roll. Popped the batter in the oven, set my timer an extra 5 minutes, and watched some cartoons with my siblings. The cake came out perfectly this time around, I laid on the frosting (sparsely, as requested), and packed it up for delivery.
I have no idea how the flavour turned out this time around, but I'm hoping it was alright. I used my usual Red Velvet recipe, but I think after that unfortunate chain of events, I may give up on it... kind of sick of the taste and smell of that recipe. Or I could just give it a rest for a few months, and try out some different recipes.

So, here's a baking tip: chill out, and get in the right state of mind before attempting to build anything.

Love love, Nabs

Red Velvet Sandwich Cookies

Photobucket
I am currently in the holiday state of mind, ready to slip on my flip-flops, bikini, slap on the suntan oil and spend the day on the sand with a good book and a frilly looking cocktail. Here on the Equator, we're lucky enough to have constant holiday weather, but I'll do you one better: we're headed to the beautiful North Island of New Zealand next week for a family holiday!

It'll be my first time there, and I'm not entirely sure what kind of clothes I need to pack... for warm weather, chilly weather or just beach clothes. Guess a cardigan or two wont harm me.

The best part about going to New Zealand, though? I get to meet with Kirstie and Tegan, two friends I've known for a very long time from SnitchSeeker, and I'm contemplating bringing my ratty old SS t-shirt just to make it easier for them to spot me in a crowd. We'll see how these visits go, I'm so excited!

The other thing I thought of when I heard we'd be going away for a week was: Ohmigosh, I can't leave my blog for a week! I'd lose any readership I had managed to gain in the past few months! lol yes, it is a very real worry for me. So I've figured out a solution... you'll see.

Anyway, let's continue with the festive themed treats, today I bring you the very simple, and yet sinfully sweet and pretty Red Velvet Sandwich Cookies. I used a recipe from Paula Deen, with very small tweaks (maybe cos I don't read instructions well and was too lazy to buy ingredients).

Photobucket

Red Velvet Sandwich Cookies

  • 1 1/3 cup all purpose flour
  • 2 tbsp cocoa powder
  • 1 tsp baking powder
  • 1/4 tsp baking soda
  • 1/2 tsp salt
  • 1/4 cup butter, softened
  • 1 cup packed light brown sugar
  • 2 large eggs
  • 2 tbsp buttermilk
  • 2 tsp distilled white vinegar
  • 1 tsp vanilla extract
  • 1 tbsp red colouring
For the cream cheese frosting:

  • 250g cream cheese, softened
  • 110g butter, softened
  • 1 tsp vanilla extract
  • 2 cup powdered sugar, sifted
Directions:

  1. Preheat the oven to 180C and line your cookie sheets with parchment paper
  2. In a medium bowl, sift together flour, cocoa powder, baking soda, baking powder and salt. Set aside.
  3. In a larger bowl, beat the sugar and butter together with an electric mixer until fluffy, then add the eggs one at a time
  4. Add buttermilk, vinegar, vanilla and colouring and beat until incorporated
  5. Once the wet mixture is fully combined, add the flour  mixture and beat until incorporated (gotta find another word for combined, incorporated...) 
  6. Drop the dough onto the cookie sheet in teaspoonful amounts, or if you have a small ice-cream scoop that's even better. Space the dough roughly 2 inches away from each other cos trust me, babeh, these will spreaaad.
  7. Bake for 10 minutes, or until fully baked through, and allow to cool on the pan for a few minutes before removing to the cooling rack to allow it to cool completely. Is the word cool starting to sound funny to you? 
  8. For the frosting: beat cream cheese and sugar together until fluffy (use a hand mixer), then add vanilla, beat for a bit more, then add the sugar 1/2 a cup at a time. 
  9. Once the cookies have cooled, spread the cream cheese frosting between them and ENJOY! 
Easy peasy lemon squeezy. I got my 10 year old brother and 11 year old sister to do the last step for me, while I sat in a corner giving orders and re-reading Fire and Hemlock by Diana Wynne Jones. Santa and her elves, that's right. Should've given them bells, too. Drat. 

Photobucket

These are cute, tasty and fun to make. Though, I made the mistake of putting the completed sandwiches in the fridge, so here's a tip: make the frosting ahead of time and refrigerate so it firms up and you won't need to put the whole sandwiches in. I've got so much left over frosting, that I'm good for another 3 batches of cookies I think. Whoops, now you all know what you're getting for Christmas! 

Photobucket

Much love,
Nabs

Monday

Christmas Tree Ruffle Cake

Photobucket
Ever since I saw this cake by Amanda (aka iammommy) last year, I've been obsessed with it. I've dreamt of the colours, the ruffles, the sweetness of it all... I just needed to wait another year for Christmas. Do you have any idea how frustrating that is? Yes, you probably do. The only thing is that I'm not sure if I'm fond of the texture differences caused by the cake-ception like the one in this picture. So with a year to think about what I want my cake to look like when I finally do it, I think I surprised even myself with how simple it was to make it over-the-top Christmas-sy!
After many, many ruffle cakes over the past year (Elyza's birthday cake, Lana's engagement cake, personal pick-me-up-cos-the-week-was-so-shite cake, and many ruffled cupcakes) the ruffles just came so much easier this time around. I find that when it matters... my frosting and decorating always falls to pieces. This is definitely because I always try to do it all in one sitting, and by the time it comes to piping, I'm exhausted and my eyesight is wonky from the prolonged contact lenses to flour/sugar exposure.
Last weekend was the perfect opportunity to try this out, because a) I had no work to do, and b) mum put me on house arrest for the weekend because of my back problem. Standing and baking all day probably wasn't the best option due to point b) but I'd run out of TV shows, films and books... and wanted to bake.
Photobucket
I used a Wilton #103 tip for the entire cake, and about 1.5 batches of frosting, though next time I should probably use a little less for the crumb coat. There were just SO many crumbs, though, so I kind of went overboard. The housekeeper gave me a tip for that: less baking soda/powder will yield less crumbs. So next time, I'll just try putting in half of what the recipe says. I did up a classic buttercream, but not one I've posted before, so I'll share it now:
Classic Buttercream Recipe
  • 1/2 cup salted butter, softened
  • 1/2 cup Crisco vegetable shortening, room temperature
  • 3-4 cups confectioners sugar, sifted
  • 1 tsp vanilla extract
  • 2 tbsp thickened whipping cream
  • * Colouring gel, as desired
  1. Whip the butter and shortening in a large bowl until fluffy, I find that using a hand mixer as opposed to the stand mixer produces a fluffier and smoother buttercream
  2. Add vanilla, whip a bit more to incorporate
  3. Gradually add the confectioners sugar, 1/2 cup at a time and beating until fully incorporated each time
  4. Depending on the consistency you want to achieve, slowly add the cream. I find that 2 tbsp is perfect, but sometimes depending on other conditions, I may need more or less
  5. Pipe! For ruffles, use a petal decorating tip (#104 for a slightly larger, taller cake though I used a #103) and starting at the bottom of the cake, with the bigger opening on the cake side, at almost right angles with the cake, just dash back and forth all the way up. This video might explain it better.
Photobucket
And when you're done, have cleaned up the kitchen and let the cake sit in the chiller for an appropriate amount of time (which basically equals to enough time for you to shower, get dressed and look presentable)... make yourself a cup of coffee (hold the sugar) and cut a slice of cake.
Photobucket
I don't even need an excuse to bake cakes anymore, my parents are no longer surprised, though they make "tsking" sounds whenever they find the fridge packed with desserts. Every day is cake day!
Photobucket
Especially red velvet cake. Look at how seasonal this cake turned out! My mum didn't see me bake this, and when I cut a slice, it was gratifying to hear her gasp. Yay Christmas!
Anyway, hope you all enjoyed this one, because I'm sort of still on a bit of a high. Love this one so much that I may just make a few replicas to give away...
Happy holidays!
x Nabs

Wednesday

Red Velvet Cake Balls

red velvet,cake balls
What does one do when one bakes a cake and the cake falls apart when one tips it out of the pan?
Go absolutely batshit cray-cray on the cake and mash it into pieces in a rage. That's what.
And then, one obviously repents, decides to break up the other perfect layer as well and then whip up a batch of cream cheese frosting to make... Cake balls!
I've always wanted to make one of those perfect little cakepops (made so popular by Bakerella) or even just make regular cake truffles, but never had the motivation to do it. Now, with a ruined, perfectly yummy tasting batch of red velvet cake, it seemed like as good a time as any.
The only problem is that I can't find candy melts ANYWHERE! So, to any of my friends in town who knows where to get this stuff that doesn't involve ordering it online, could you please give me a heads up?
  1. Break up the cake in a large bowl, mix in the cream cheese frosting with a spatula, use your hands if you must
  2. Roll into balls of about 1 1/4 inches diameter (I got lazy halfway through and now have mixed sizes)
  3. Refridgerate for at least 1 hour or overnight
Chocolate coating:
  • 3oz unsweetened chocolate
  • 2oz semi-sweet chocolate
  • 1/2 heavy whipping cream
  1. Melt all ingredients in a double-boiler
  2. Let it cool for a bit, then just roll your cake balls in the chocolate with two forks
  3. Drop the ball onto prepared sheet of baking paper
  4. Refrigerate for at least 1 hour
My first attempt at making cake balls produced some rather grotesque looking balls, but the taste and texture worked quite well for the kids in my family (and even some aunts!). I'll try to make them look prettier next time, and hopefully be able to find candy melts to use.
Have fun!
x Nabs

Red Velvet Cream Cheese Swirl Cookies

Photobucket
From the very same genius who brought us the recipe for Butterbeer Cupcakes, comes this deviously tempting little gem: Red velvet cookies with a cream cheese swirl.
I love Red Velvet cake, LOVE it, but I can't possibly eat cake every single day if I hope to maintain some form of a waistline. It's not much of one, but at least there is a slight curve (though one may counter that it's simply because my butt balloons outwards). Whatever, I love where my weight is right now, it's not ideal, but neither is completely giving up the food I love.
So, while browsing through Amy's blog to check out the butterbeer cupcake recipe, I stumbled across her red velvet cookie recipe! How gorgeous are those cookies? They're so striking that people can't help but to take a second look.
Anyway, last Saturday night, I came home from a night out with my cousins and friends, with the most peculiar desire to bake! It was almost 4 in the morning, and I was physically tired, but I still managed to whip up a batch of cookies in no more than 30 minutes.
Some people are just not normal.
Photobucket
They smelled and tasted delicious, though. I've now decided to add this to my list of treats to bake when I'm back in Sarawak next week. Though will take the creator's word for it and not let the cream cheese get TOO mixed in with the dough. Mine is barely noticeable, however, the taste is still there,

Red Velvet Cookies with Cream Cheese
Courtesy of amybites.com
  • 1/2 cup unsalted butter
  • 1/3 cup sugar
  • 1/4 cup brown sugar
  • 1 egg
  • 1 teaspoon vanilla
  • 1 teaspoon red food coloring
  • 1 cup all purpose flour
  • 1/2 cup white whole wheat flour
  • 1 teaspoon baking soda
  • 1/4 teaspoon salt
  • 1/3 cup cocoa powder
  • 3 tablespoons reduced fat cream cheese, softened
Photobucket
  1. Preheat oven to 180ÂșC.
  2. Cream butter and sugars together until fluffy and well-combined.
  3. Beat in egg and vanilla, then beat in food coloring.
  4. Add flours, baking soda, salt, and cocoa powder and mix until just combined.
  5. Add cream cheese in pieces to dough and mix briefly until just swirled.
  6. Portion out by tablespoonfuls onto cookie sheet and bake 10-12 minutes. Cool on cookie sheets.
Photobucket
This is a gorgeous recipe, but please... do not put in TOO much colouring. Also, if in doubt, when swirling in the cream cheese, it's probably best to simply use a spatula.
Love,
Nabiya