Showing posts with label cream cheese frosting. Show all posts

Sunday

Hummingbird Bakery's Red Velvet Cupcakes

I had a go-to red velvet recipe, one I thought I was happy to use for the rest of my life... but then I went to London last October, bought a red velvet cupcake from the Hummingbird Bakery on Portobello... realised I have their recipe book at home, decided to try it and have not turned back since. Their cream cheese frosting recipe is also the one I've been using for years now, so it truly is a perfect pairing!


There were many birthdays in my family this week, and a special one in the manfriend's family... and also I kinda had a craving for a red velvet cupcake (clean eating begins MONDAY!). So, following a terribly self-indulgent Saturday morning, I decided to whip up a few batches of these little babies.

Don't they look pretty? My baby boomer dad surprised me by splitting the cupcake in half and eating it like a cupcake sandwich. Who knew he subscribes to Lifehack pinterest board advice?


Anyway, for those of you still on the hunt for the perfect red velvet cupcake recipe, look no further. The Hummingbird Bakery's recipe is definitely the way to go.

Red Velvet Cupcake
Yield: 12 cupcakes
  • 60g unsalted butter, at room temperature
  • 150g caster sugar
  • 1 egg
  • 20g cocoa powder
  • 30ml red food colouring
  • 1 tsp vanilla extract
  • 120ml buttermilk
  • 150g all purpose flour
  • 1/2 tsp baking soda
  • 1 1/2 tsp white vinegar
  1. Preheat the oven to 180°C and prepare your cupcake liners
  2. Cream the butter and sugar in a large mixing bowl until fluffy, then add the egg and beat until fluffy
  3. In a small bowl, mix the cocoa powder, red food colouring, and vanilla into a thick paste then add it to the butter mixture, beating well to incorporate
  4. Add half the flour, beating until just combined, then add all the buttermilk, mixing well before adding the rest of the flour
  5. Last step, add the baking soda and vinegar and beat until just combined before dividing the batter into the cupcake liners. Fill the liners 2/3 of the way up, then lower the oven temperature to 165°C and bake for 25 minutes
  6. Allow the cupcakes to cool for 5 minutes into the cupcake tins before removing to a wire rack to cool completely. You may, like my brother and boyfriend, prefer to eat these without frosting... but for the purists who believe that red velvet cake must be eaten with cream cheese frosting, decorate as you will with this cream cheese frosting. I used a Wilton 1M tip to decorate with these darling little swirls. 

Friday

Passionfruit Macarons


I've said it before, that I'm not a fan of macarons. They're too sweet, and I don't really like the texture of the shells... but they are so much fun to make! Baking to me is a sacred art, one that removes me from this realm and takes me onto another plane of peace and calm and sugar and happiness. So on a particularly bad day, I tackle the most complicated recipes. 

A lot of my baker friends ask how I have the patience to work on macarons, but really... it's so calming. The fact that you need to be 100% focused on the task, and then to have all the conditions around you at just the right state... and after all that concentration, when you peek into the oven after 10 minutes and see the little "feet" forming... it's like pulling off magic. 


I made these little pink macaron shells to fill with passionfruit curd and leftover passionfruit cream cheese frosting. They followed a particularly difficult work week, and I realised how completely stress free I had become while snapping pics of these little delights. I might have to make more macarons tonight. 

Macarons
Makes around 20 macarons (about 40 shells)
  • 100g aged egg whites (I simply left them uncovered on the counter for 48 hours, though I've read that this is unnecessary) 
  • 1 tsp meringue powder (optional)
  • 110g ground almonds
  • 200g icing sugar
  • 1/2 tsp salt
  • 50g caster sugar
  1. Line two baking trays with parchment paper
  2. Run the ground almonds, icing sugar, and salt in the food processor for roughly 30 seconds, then set aside
  3. Whisk the egg whites and meringue powder in your large stand mixer bowl until soft peaks have formed
  4. Gradually add the caster sugar to the egg whites, and continue to whisk until stiff peaks form
  5. Here's the tricky bit (but easily overcome by watching a few youtube how to vids): dump the dry mixture into the meringue, then with a spatula, just fold it in. I really cannot give you definite instructions for when to stop, but I stopped when the batter was softly oozing (like the lava in that film, Dante's Peak), and when a dollop over it blended into the rest within 30 seconds (just watch this video, maybe?)
  6. Once you've possibly achieved the correct consistency, transfer the batter into a piping bag, snip off the edge and then pipe out 1" circles onto the baking trays, roughly 1" apart
  7. When you've piped everything out, bang the trays on the counter 3-5 times
  8. Leave the trays out for 30 minutes to an hour, and then bake in a preheated oven at 150C for 18 minutes
  9. Let the mac shells cool completely before removing them from the paper or they will peel and break off from the bottoms
  10. Pair the shells up with similar sized ones, then pipe in your filling and sandwich them together


Saturday

Holibaking & Hummingbirds


I've hit a snag in my holiday baking (or holibaking as it shall henceforth be known) plans: my family doesn't eat desserts as fast as I want to make them!

Arrrrrgggghhhhh. This is tough guys, like, it's a serious problem. To me. I've got all this pent up energy and a basket of browning bananas sitting on my kitchen island, yet I'm unable to make that banana cake I've been dying to bake for (oh, I don't know) months, just because we still have leftover cupcakes, crepe cake, and that awesome yellow cake with chocolate sour cream frosting.

I suppose I kinda neglected that one teeny tiny detail of my working days... I usually bake 'em, pack 'em, and bring 'em to work for my colleagues to have at tea time. Hmmm... I'm starting to eye my neighbours doorbells like a starving cartoon character would see a giant talking T-bone steak taunting them, just... begging to be rung. Maybe it's time to host a street party, or even just show up randomly at the neighbours' with wrapped goodies?

Or maybe it's time I get out of the house. I don't know why, but my hermit mode switches right on when I'm on holidays. I don't go out unless someone drives me, and I wake up mid day to have coffee and watch tv with my siblings, then I try to trick the senses by taking a shower and getting all dressed up even though I know deep down that I have not a single ounce of intention to cross that threshold. Dude, I'm so lazy. I love it though.

Here's something that I baked this week, had tons of fun with, and was quite a hit with the parents: hummingbird cupcakes with whipped cream cheese frosting. The recipe was basically the one I used here, minus the pears, and this whipped cream cheese frosting which is currently my favourite to top cakes with. Great taste and texture, but ooooh boy... I think I need to cycle around the lake tomorrow morning. Just to make up for this week I've spent on my arse.

Anyone wanna come over for morning coffee/high tea/dessert?

Love, Nabs

Friday

Of Anniversaries, Chocolate, and Love

My parents met each other at different times. In fact, my mother met my father years before he met her. 

Don't worry, I'm not going to go off the recipe blogging track and begin writing a time-travel romance novel. 

To hear mum tell it, she had a crush on papa since she was fourteen years old! They went to St Teresa's Girls School and St Joseph's Boys School respectively, and (from what people tell me) he fancied himself quite the Big Man on Campus; he played sports for the school, was listed as one of the top students of the state in his year, and well, there's the whole mixed heritage thing he had going for him I suppose. 

It has been thirty-six years since mum first fell into puppy love with papa, and as of this week, they have been married for twenty-nine years. Out of those twenty-nine years, they made and raised four wonderfully bright and attractive (lololol) children, even if the distribution of said intelligence and genetic blessing was imbalanced, as the first batch got far too much (oh, make it stop!) of the good stuff. They have bought, sold and lived in a total of fourteen houses (nomads, much?), crossed the seas countless times in pursuit one can only assume frequent flyer points, changed career paths seven times (shared number), shared at least 10 000 meals together ("A family that eats together, stays together" yes, Papa *salutes*) and only some crazy zany nerd would bother to count the rest. 

My parents have always put the family first, and growing up with those values, I don't think anybody can blame me for wanting the kind of love, stability, and intimacy that they have. They are each others' best friend, and that is all I really want. 
I took the day off work today to spend a day with the family; the kids are on holiday from school and it's my parents' anniversary! I couldn't not bake them a cake! Plus I had quite a number of annual leave days I needed to clear by the end of the month.
So on this beautiful Friday, after a very lazy morning spent by the pool, I got started on this super special Chocolate Beetroot Cake with Beet Creamcheese Frosting. There was so much batter that I decided to bake smaller cakes instead, and ended up with two 8-inch cakes. One for my parents, and the other for my to bring to an outing with some of my close work friends tonight. 

I would love to get into my parents' whole love story, and soon I will get around to telling you about the time my father met my mother. Now that, folks, was quite cray. 
But for now, let's channel a bit of Bob Saget as he retells the incredibly unromantic tale of how Ted Mosby slept with the same 3 women over ten years and Uncle Barney shagged everything that moved... and bring you back to the current day. 8th of June 2012 to be exact. 
In precisely two weeks time, my cousin, Lana, is going to marry one of the most stand-up men I have had the pleasure to meet since coming back to the country, Omar. 
We're rushing around with our last minute fittings, picking up items from various places, receiving frantic phone calls at the most inopportune times, and all the usual wedding-in-the-family activities. Just a few days before her wedding, our whole mildly insane troupe will be flying into Miri, Sarawak (top 5 happiest places in the world) where we will have a massive Sarawakian-style pre-wedding party! 
Alright, alright, it's really about the wedding, the marriage between these two people, and the life that they are about to embark on together. 
But it's also a little about the food and drinks and dressing up. For the rest of us that are not the bride and/or groom at the wedding that is. 
Last weekend, we gathered the close cousins/friends for a tea-time bridal shower for Lana, organised by the newlywed Amy. She chose the place (love it!), theme (think I got it...), and most importantly: the games! We had so much fun over the space of a few hours, with Kaly and I up to our usual competitive tricks and winning all the games (are bridal showers like birthday parties, where the bride should win all the games?) and prizes, and being quite ungracious while doing so.

I wasn't going to blog the cake recipe that I brought to the bridal shower, mostly as it's so simple... but then again, I reckon that those are the best kind! My work-wife, Diyana, sent me the recipe for the Black Magic cake a few months ago and since then I'm sure I've used it at least four times. Forsooth, I stopped wondering why my waist is expanding.
Black Magic Chocolate Cake
Recipe from my baking addiction
  • 2 cups sugar
  • 1 3/4 cups all-purpose flour
  • 3/4 cup Hershey's Unsweetened Cocoa Powder
  • 2 teaspoons baking soda
  • 1 teaspoon baking powder
  • 1 teaspoon salt
  • 2 eggs
  • 1 cup buttermilk
  • 1 cup strong black coffee
  • 1/2 cup vegetable oil
  • 1 teaspoon vanilla extract
  1. Preheat the oven to 180C and line or grease your baking tins. I used a Wilton Bundt pan
  2. Here's the best part: Combine all the ingredients in the large bowl of your stand mixer and just let it whizz on medium for about 2 minutes! 
  3. Pour batter into your baking tin and bake for 30-40 minutes, or until a skewer inserted at an angle comes out clean
  4. Frost as you like (for this occasion, I whipped up some Chocolate Orange ganache) and Tada! 
So ridonkulously easy, I don't even know what to do with myself. This recipe will yield one of the fluffiest, lightest and chocolatey cakes you will ever have in your life. Try layering it with unsweetened whipped cream! The balance of textures in that mixture creates a wonderful mouthfeel that you'll find yourself craving weeks after. 
Anyway, enough about the cake: To Lana & Omar, I can't wait for the wedding, and I'm sure you two are going nuts at the moment with all the prep, so probably don't have the time nor the inclination to read this blog, but if you do: I wish you both all the best that you can find in each other, that you will make happiness and laughter, and that you will have damn good-looking children! Love you both so much xx Nabs

Tuesday

Beet It! Chocolate Cake

I spent the majority of last Saturday's daytime hours in the kitchen, baking cakes, cupcakes and scones for several orders received from friends and family. I first baked two dozen chocolate cupcakes with chocolate ganache for my mother to take to her friends' do, low fat raisin scones for breakfast (recipe coming up in the next few days), a red velvet cake, and this beautiful Chocolate Beet cake.
I found the recipe for this cake a few weeks ago on Joy the Baker's blog, and knew that I had to try it at the next occasion. And what better occasion than one of my dearest friend's birthday?

Angie and I first found each other in 1st Form, in St Teresa's girl school back in Sarawak. We got on like a house on fire, and were inseparable for that entire school year! My family moved the next year, and then Angie and I had to content ourselves with meeting only once or twice a year. But now that we've both graduated and started work, she's moved to the city and is more accessible to me! Huzzah!

Happy birthday, my love, I hope you enjoyed the cake and the company, and I can't wait to see you again (Friday Karaoke!). Love you loads.
Ravenclaw - Nadia, Slytherin - Angie, Muggle - Jess <3
Chocolate Beet Cake
Recipe by Joy the Baker
  • 1 large beet (or 2 small-medium ones) - 3/4 cup grated for the cake, 2 tbsp grated for the frosting
  • 1 tsp vegetable oil
  • 170g butter, softened
  • 1 cup packed brown sugar
  • 3/4 cup caster sugar
  • 2 large eggs
  • 1 tsp vanilla extract
  • 2 cups all purpose flour
  • 2/3 cups unsweetened cocoa powder
  • 1 tsp baking soda
  • 1/2 tsp baking powder
  • 1 tsp salt
  • 1 1/4 cup buttermilk
  1. First of all, some prep work: Wrap the beets (unpeeled, just trimmed of greens and scrubbed clean) in foil paper, wipe down with the vegetable oil and pop in the oven for an hour or so at 200C, or until a knife poked through the beets go through easily. When they're ready, remove and cool for a while, then peel and grate the beets on the fine grate of a box grater and set aside
  2. Preheat the oven to 180C and line your 8x8 round baking pan with butter and parchment paper
  3. Combine the flour, cocoa powder, baking soda & powder and salt in a medium bowl and set aside
  4. Cream the butter and sugars until light, then beat in the eggs (one at a time), vanilla and beets
  5. Beat in half of the flour mixture until incorporated, then pour in all the buttermilk, followed by the rest of the flour when the milk has mixed completely
  6. Divide the batter between your pans, and bake for 30-35 minutes or until a skewer poked through at an angle comes out clean. You don't want to overcook this cake, trust me. When it's done, allow the cakes to cool in the pan for 10 minutes, then move onto a cooling rack to cool completely
Cream Cheese Beet Frosting
  • 1 cup butter, room temperature
  • 8 oz cream cheese, room temperature
  • 2 1/2 cups powdered sugar (Joy's recipe calls for 4-5 cups, but the thought of that much sweetness makes me gag)
  • 2 tbsp finely grated beets
  • 1 tsp vanilla extract
  • 1/2 tsp milk
  • 1/2 tsp lemon juice
  • Salt
  1. Cream the butter and cream cheese until light and fluffy
  2. Beat in the beets, vanilla, lemon juice and salt
  3. Beat in the sugar, half a cup at a time, beating well after each addition. Add the milk as and when it's necessary, though I didn't need to add any for my second batch

Assembling the cake
The first time I made this cake for Angie, I put a layer of the cream cheese frosting between the cake layers, though this resulted in too sweet a cake for my liking, and it kind of overpowered the taste of the chocolate. I baked a second cake the next day (for picture purposes, as well as to give a chance to my family to try this amazing recipe... thanks, Joy!) and slathered a layer of blackberry coulis (cos I love that stuff!) in between instead. Cover the cake with a thin layer of cream cheese frosting, then pop in the fridge for 15 minutes to half a hour to allow the "crumb coat" to set. Then apply another top coat (it's like getting a manicure) sparsely, you don't want too much frosting, and use a warm bench scraper (dip the scraper in a bowl of hot water, then wipe it clean quickly before use) to smooth the sides of the cake. Chill in the fridge for at least half an hour to allow the layers to set.
Sneaking veggies into dessert and then fooling ourselves that it was a healthy snack is one of my favourite things to do! Who doesn't like claiming their 5-a-day in a slice of dense, moist chocolate cake? 

If you like chocolate, you'll LOVE this cake. I was really worried that it would taste like salad, what with beets in the cake as well as in the frosting, but all the beets really add to the cake are their moisture. So if you want to try something a little fancier than zucchini in your chocolate cake, give this one a shot. 
Lots of love, 
Nabs

Sunday

Earl Grey tea cupcakes

Photobucket

On every family holiday, my father allocates a minimum of TWO days for shopping, which is a very smart system so we don't go nuts on the first day, and also so we don't waste time in shops on the non-shopping days. On the latest holiday to NZ, I went to TOWN in Stevens, Albany Mall. Talk about a dream come true!

See, we don't have shops like that here in Malaysia, and what shops we do have, have (am I the only one who despises using double words like that?) limited supplies and are far too expensive for a poor, entry-level consultant like myself. I bought at least 12 items (including stuff from Living & Giving) for under NZ$100!

Granted, it was also during the Boxing Day sales *snickers*
Photobucket
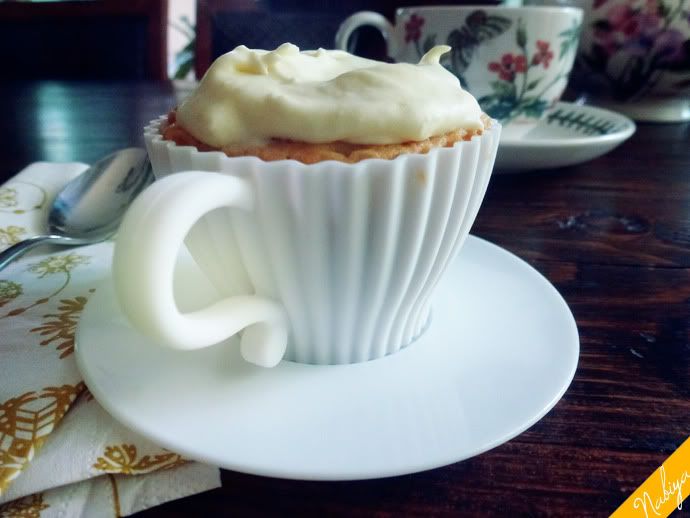
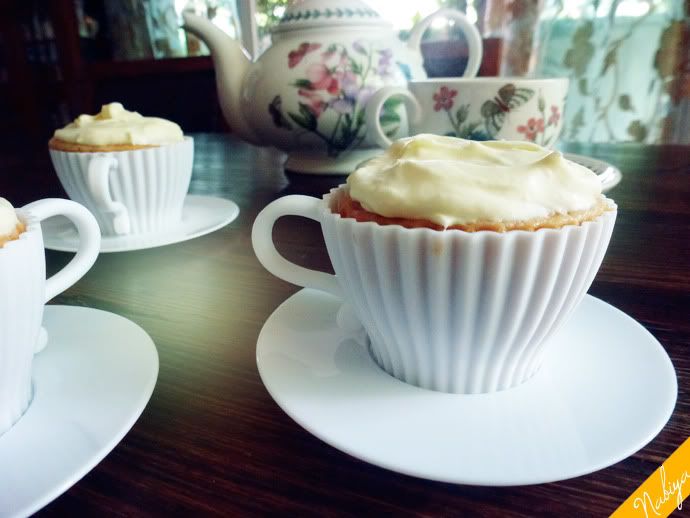
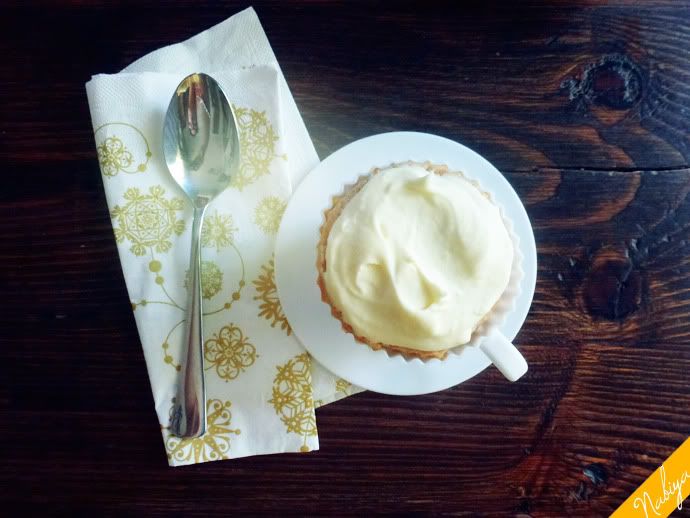
One of the things I bought were these super cute silicone teacup cupcake molds, and I've been thinking about them ever since. What flavour should I make them? What toppings? When? I decided to go literal and make earl grey tea flavoured cupcakes, with a basic cream cheese frosting (mostly cos I'm lazy...). Oh, for those interested, you can order the molds online here.

I found this brilliant recipe from objetivo cupcake (thank R'hllor for auto translate!) which doesn't require using tea-leaves, straining and so on and so forth. It's quick, easy and doesn't yield very much batter, which is a blessing sometimes as I've already got a backlog of desserts in my fridge and mum's none too pleased about it.

It's been a while since I last typed up a blog post, so I'm a little rusty and the words aren't flowing. Let's just get on with it!
Photobucket
Earl Grey tea cupcakes
Yields 12 large cupcakes
  • 125 ml skim milk (use whatever type you prefer)
  • 4 bags Earl Grey tea
  • 110g butter, room temperature
  • 225g caster sugar
  • 2 large eggs
  • 245g all-purpose flour, sifted
  • 2 tsp baking powder
  1. Heat the milk in a saucepan until nearly boiling
  2. Remove from the heat, infuse the teabags for half an hour, in this time, enjoy a cup of tea and an episode of Friends
  3. Preheat the oven to 180C, prepare your cupcake molds
  4. Sift the flour and baking powder in a medium bowl and set aside
  5. Beat the butter and sugar with the paddle attachment on medium speed for 4-5 minutes, or until the mixture is light and fluffy 
  6. Add the eggs one at a time, beating well after each addition. Be sure to scrape the bottom and sides of the bowl to ensure all the butter mixes with the eggs
  7. Add 1/2 of the flour to the butter mixture, beat at medium speed until fully incorporated
  8. Add 1/2 of the milk/tea, beat at medium speed until just combined
  9. Repeat steps 7 & 8 until you're done (which means you only repeat each step once, duh, Nabs)
  10. Fill your cupcake liners 3/4 of the way up, bake for 20 minutes or until a skewer poked through at an angle comes out clean
Then kick back, and enjoy a cupcake with it's best partner: a cup of Earl Grey tea, and just chill out. Tea solves all problems, doncha know? 
Photobucket
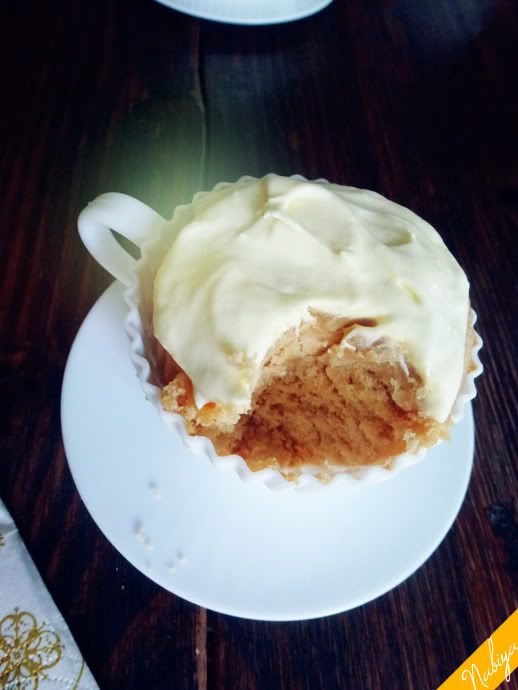
The texture was amazing, slightly denser than the average cake, which is great for a cupcake as it doesn't crumble as much. The flavour of the Earl Grey tea was full-blown and it made for this perfectly citrusy, fragrant aftertaste. The cake on its own without frosting is fab, but with frosting is decadent! I actually gobbled up an entire cupcake sans frosting around midnight last night... bad Nabs.

x Nabs
Thursday

Red Velvet Sandwich Cookies

Photobucket
I am currently in the holiday state of mind, ready to slip on my flip-flops, bikini, slap on the suntan oil and spend the day on the sand with a good book and a frilly looking cocktail. Here on the Equator, we're lucky enough to have constant holiday weather, but I'll do you one better: we're headed to the beautiful North Island of New Zealand next week for a family holiday!

It'll be my first time there, and I'm not entirely sure what kind of clothes I need to pack... for warm weather, chilly weather or just beach clothes. Guess a cardigan or two wont harm me.

The best part about going to New Zealand, though? I get to meet with Kirstie and Tegan, two friends I've known for a very long time from SnitchSeeker, and I'm contemplating bringing my ratty old SS t-shirt just to make it easier for them to spot me in a crowd. We'll see how these visits go, I'm so excited!

The other thing I thought of when I heard we'd be going away for a week was: Ohmigosh, I can't leave my blog for a week! I'd lose any readership I had managed to gain in the past few months! lol yes, it is a very real worry for me. So I've figured out a solution... you'll see.

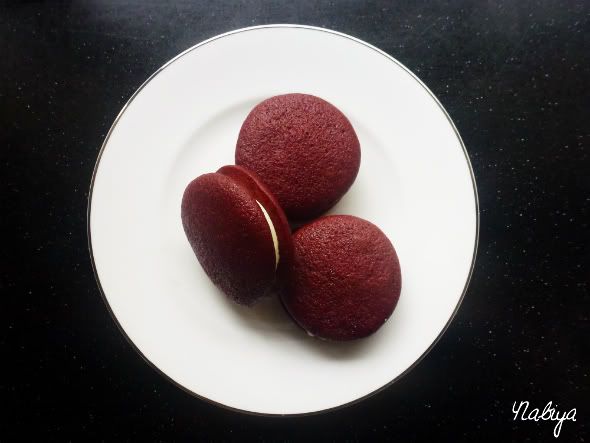
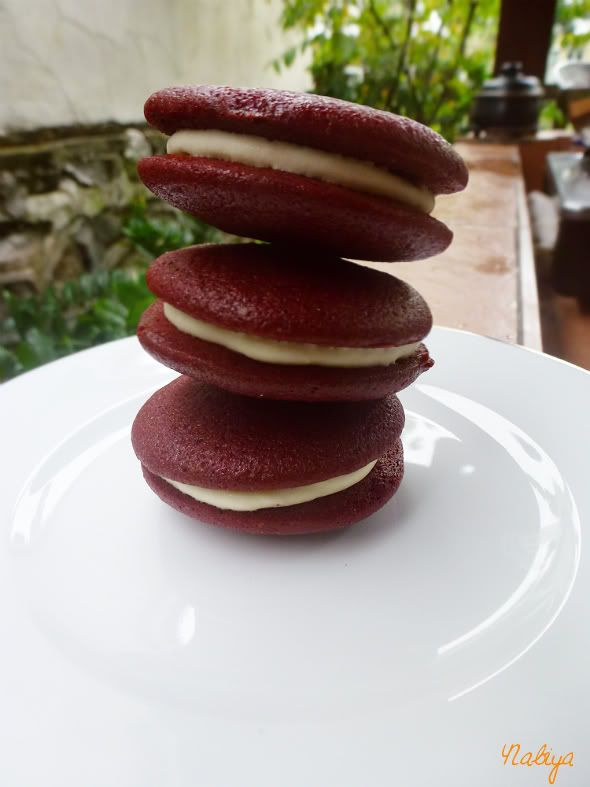
Anyway, let's continue with the festive themed treats, today I bring you the very simple, and yet sinfully sweet and pretty Red Velvet Sandwich Cookies. I used a recipe from Paula Deen, with very small tweaks (maybe cos I don't read instructions well and was too lazy to buy ingredients).

Photobucket

Red Velvet Sandwich Cookies

  • 1 1/3 cup all purpose flour
  • 2 tbsp cocoa powder
  • 1 tsp baking powder
  • 1/4 tsp baking soda
  • 1/2 tsp salt
  • 1/4 cup butter, softened
  • 1 cup packed light brown sugar
  • 2 large eggs
  • 2 tbsp buttermilk
  • 2 tsp distilled white vinegar
  • 1 tsp vanilla extract
  • 1 tbsp red colouring
For the cream cheese frosting:

  • 250g cream cheese, softened
  • 110g butter, softened
  • 1 tsp vanilla extract
  • 2 cup powdered sugar, sifted
Directions:

  1. Preheat the oven to 180C and line your cookie sheets with parchment paper
  2. In a medium bowl, sift together flour, cocoa powder, baking soda, baking powder and salt. Set aside.
  3. In a larger bowl, beat the sugar and butter together with an electric mixer until fluffy, then add the eggs one at a time
  4. Add buttermilk, vinegar, vanilla and colouring and beat until incorporated
  5. Once the wet mixture is fully combined, add the flour  mixture and beat until incorporated (gotta find another word for combined, incorporated...) 
  6. Drop the dough onto the cookie sheet in teaspoonful amounts, or if you have a small ice-cream scoop that's even better. Space the dough roughly 2 inches away from each other cos trust me, babeh, these will spreaaad.
  7. Bake for 10 minutes, or until fully baked through, and allow to cool on the pan for a few minutes before removing to the cooling rack to allow it to cool completely. Is the word cool starting to sound funny to you? 
  8. For the frosting: beat cream cheese and sugar together until fluffy (use a hand mixer), then add vanilla, beat for a bit more, then add the sugar 1/2 a cup at a time. 
  9. Once the cookies have cooled, spread the cream cheese frosting between them and ENJOY! 
Easy peasy lemon squeezy. I got my 10 year old brother and 11 year old sister to do the last step for me, while I sat in a corner giving orders and re-reading Fire and Hemlock by Diana Wynne Jones. Santa and her elves, that's right. Should've given them bells, too. Drat. 

Photobucket

These are cute, tasty and fun to make. Though, I made the mistake of putting the completed sandwiches in the fridge, so here's a tip: make the frosting ahead of time and refrigerate so it firms up and you won't need to put the whole sandwiches in. I've got so much left over frosting, that I'm good for another 3 batches of cookies I think. Whoops, now you all know what you're getting for Christmas! 

Photobucket

Much love,
Nabs
Wednesday

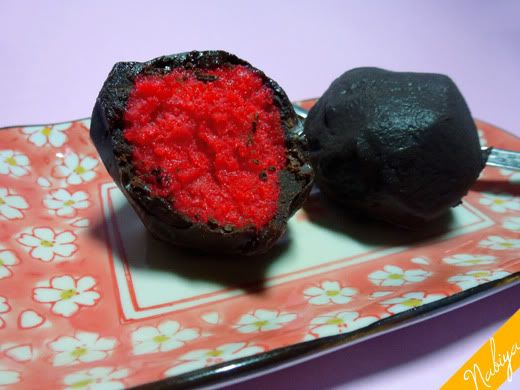
Red Velvet Cake Balls

red velvet,cake balls
What does one do when one bakes a cake and the cake falls apart when one tips it out of the pan?
Go absolutely batshit cray-cray on the cake and mash it into pieces in a rage. That's what.
And then, one obviously repents, decides to break up the other perfect layer as well and then whip up a batch of cream cheese frosting to make... Cake balls!
I've always wanted to make one of those perfect little cakepops (made so popular by Bakerella) or even just make regular cake truffles, but never had the motivation to do it. Now, with a ruined, perfectly yummy tasting batch of red velvet cake, it seemed like as good a time as any.
The only problem is that I can't find candy melts ANYWHERE! So, to any of my friends in town who knows where to get this stuff that doesn't involve ordering it online, could you please give me a heads up?
  1. Break up the cake in a large bowl, mix in the cream cheese frosting with a spatula, use your hands if you must
  2. Roll into balls of about 1 1/4 inches diameter (I got lazy halfway through and now have mixed sizes)
  3. Refridgerate for at least 1 hour or overnight
Chocolate coating:
  • 3oz unsweetened chocolate
  • 2oz semi-sweet chocolate
  • 1/2 heavy whipping cream
  1. Melt all ingredients in a double-boiler
  2. Let it cool for a bit, then just roll your cake balls in the chocolate with two forks
  3. Drop the ball onto prepared sheet of baking paper
  4. Refrigerate for at least 1 hour
My first attempt at making cake balls produced some rather grotesque looking balls, but the taste and texture worked quite well for the kids in my family (and even some aunts!). I'll try to make them look prettier next time, and hopefully be able to find candy melts to use.
Have fun!
x Nabs
Tuesday

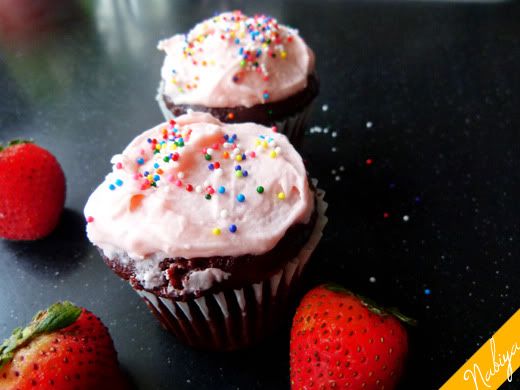
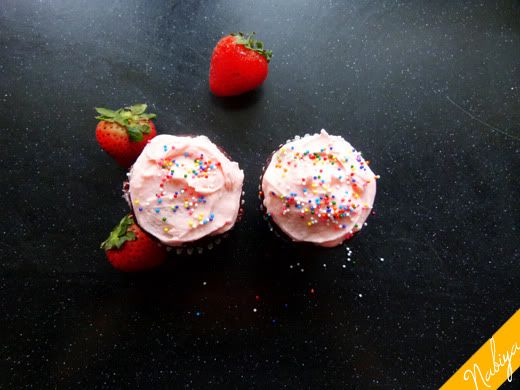
Chocolate Cupcakes with Strawberry Cream Cheese Frosting

Photobucket
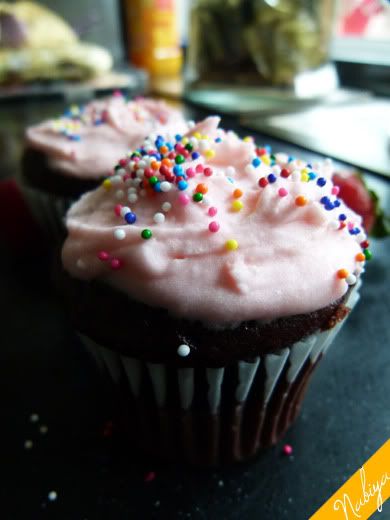
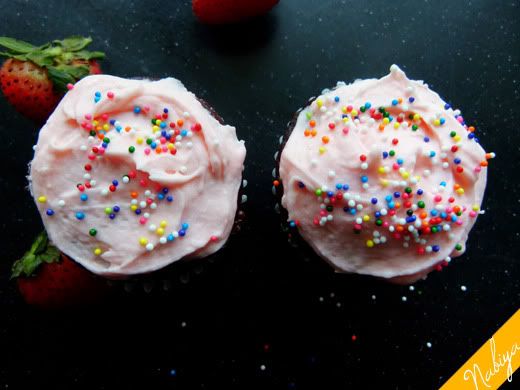
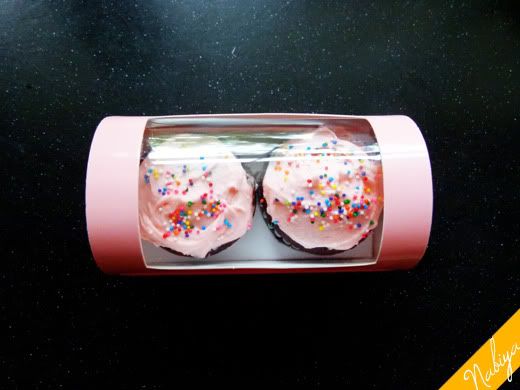
Before we begin, let me just warn you that this entry may be a tad image heavy, despite the fact that by the time I got to photographing the cupcakes there were only two left... they were so cute, and the lighting was working so well for me that I got totally carried away!
Photobucket
Anyhoo, as mentioned previously, I made my first cake sale last weekend, and along with a strawberry cake, my friend also wanted some cupcakes. At first I didn't think I would have the time to manage the cupcakes, but decided to try for it anyway. I whipped up my go-to chocolate cake recipe, and popped them in the oven while I was frosting the cake.

While the cake sat in the chiller and the cupcakes baked, I managed to shower, get dressed and put on make up before running back to the kitchen to finish the job.
Photobucket
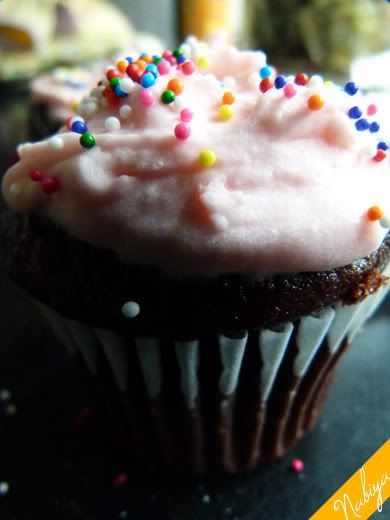
I honestly didn't think I'd make it, but thankfully had enough left over cream cheese frosting from the cake to frost a few of the cupcakes. I only made some miiiinor adjustments.

Strawberry Cream Cheese Frosting recipe:
  • 8oz cream cheese, softened
  • 1/4 cup butter, room temperature
  • 1/2 strawberries, pureed and sieved of seeds
  • 3 - 4 cups powdered sugar (or until you achieve the taste and consistency you want)
Photobucket
  1. Whisk butter and cream cheese until light and fluffy, for about 5 minutes on medium speed
  2. Mix in the strawberry puree
  3. Beat the sugar in half a cup at a time for 3-4 minutes each addition
  4. *Optional: Add a drop of pink colouring gel
This was also the first time I just applied frosting with a spatula as opposed to piping, and it was daunting! With decorating tips, you KNOW they'll turn out pretty, and yet with this method... there's the chance that they'll look messy, lazy and half-hearted.
Photobucket
I think this method makes for really cute cupcakes, though... Am thinking of making a large batch with different flavours and colours! Cute! Maybe a Hogwarts houses themed batch!
Photobucket
x Nabs
Monday

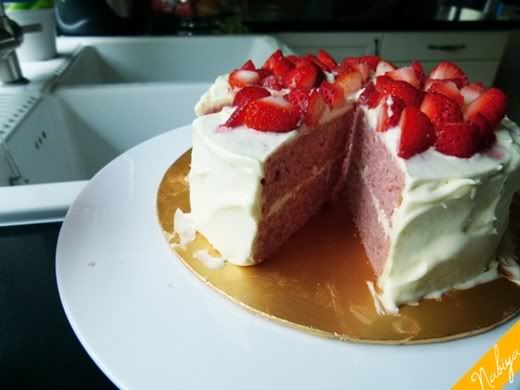
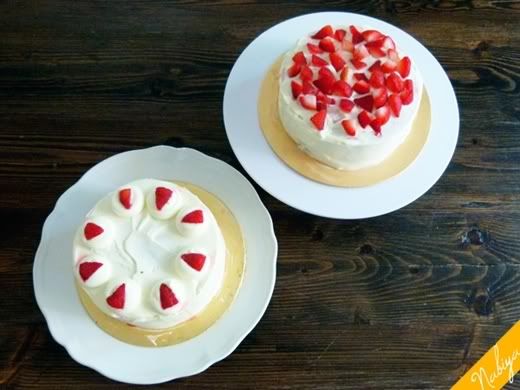
Strawberry Cake

Photobucket
I came across a picture of a slice of strawberry cake while scrolling down my Tumblr feed last week, a basic vanilla cake with a layer of whip cream and fresh, plump looking strawberries in the middle. Made my mouth water, and I then proceeded to google strawberry cake. I can't believe I have never actually eaten a real strawberry cake before!
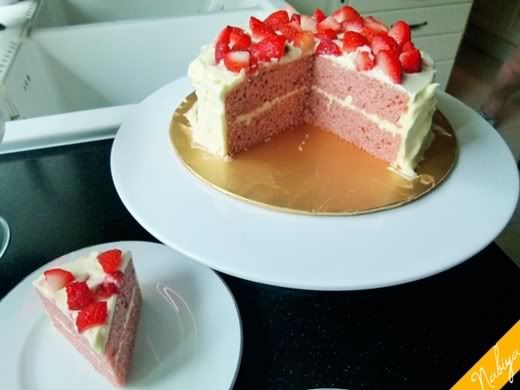
So I scoured the internet for a recipe that sounded appealing. Too many strawberry cake recipes involve using cake mix and/or strawberry gelatin, and I just wanted a fresh cake made from scratch. Finally found one by Kate, over at A Dash of Sass (seriously, go look through this blog, I love her entries!) and it looked easy enough.

Photobucket
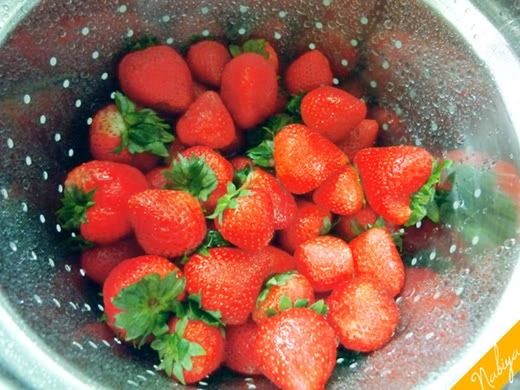
The only problem is the price of fresh strawberries in Malaysia. For good, sweet, juicy strawberries, I had to pay out of my nose. You can substitute fresh strawberries for frozen ones, but I don't recommend using canned fruit for this. The syrup from the canned fruit will muck up the balance of sweetness in the recipe.
Photobucket
Anyhoo, on to the recipe (sourced from A Dash of Sass, who adapted it from Paula Deen's Hummingbird Cake recipe)

Strawberry Cake

  • 3 cups self-rising flour
  • 2 cups granulated sugar
  • 3/4 cup melted butter* (Kate uses vegetable oil, which is fine, I just prefer butter)
  • 1 1/2 cup pureed strawberries, strained of seeds
  • 1 teaspoon pure vanilla extract
  • 1 teaspoon lemon zest
  • 4 large eggs, beaten
  • red food coloring (optional)

Directions:

  1. Preheat oven to 325 degrees. Spray and flour three 8-by-2-inch round cake pans, tapping out excess flour; set aside.
  2. Prepare the cake batter; in a large bowl, stir to combine self-rising flour, sugar, oil, pureed strawberries, vanilla, lemon zest, and eggs.
  3. Divide batter evenly between prepared pans, smoothing with an offset spatula. Bake, rotating pans halfway through, until the tops spring back when gently pressed with your fingertips, 26 to 28 minutes.
  4. Transfer pans to a wire rack to cool 10 minutes. Invert cakes onto wire rack. Re-invert cakes and let them cool completely, top sides up.
  5. Prepare the cream cheese frosting (recipe below); frost as desired and refrigerate until ready to serve.
With this batch, I managed to fill four 7-inch pans

Photobucket

Cream Cheese Frosting

  • 1 8oz package of cream cheese, softened
  • 1 stick of butter, softened
  • 1 tsp. vanilla
  • 3 cups (approx. 1 box) confectioners sugar (powdered sugar)
  • 1 TBL milk (if needed)

Directions:

  1. Beat cream cheese and butter together until smooth.
  2. Slowly add the sugar in 1 cup batches until desired sweetness is achieved. You may need less than 3 cups if you like your frosting less sweet.
  3. Stir in vanilla. Add milk slowly if you need a looser consistency.

Photobucket
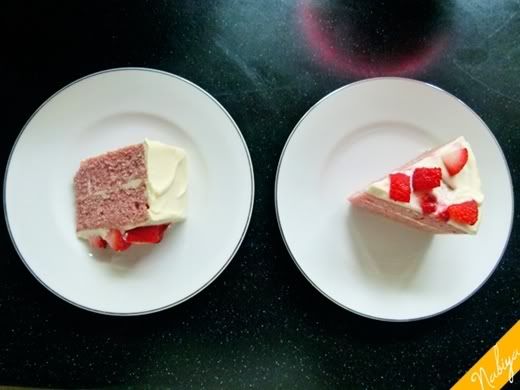
The result was the softest, freshest cake I have yet tasted... and when paired with that luscious tangy, and almost sweet cream cheese frosting it's just a really, really good cake. Trust me, this is one recipe you want to learn and have under your belt. It's easy to whip up, it tastes amazing and that lovely pink will not fail to impress.
Give it a shot, and I hope you enjoyed it as much as I have.
Posting this entry is now making me crave the taste, so despite the fact that it's midnight... I'm going to head downstairs and get myself a slice of this cake. I'll have to run an extra half hour tomorrow, but it'll be worth it!
Thank you, Kate, for this AMAZING recipe!
Love,
Nabs