Showing posts with label cheesecake. Show all posts

Monday

Raspberry Brownie Cheesecake


I've been quite ill these past few weeks, and have only just begun feeling a bit like my old self. So to celebrate, I baked up one of my favourite treats, a recipe I've wanted to share since the first time I tried it out of the Hummingbird Bakery Cookbook over two years ago.

This recipe combines three of my favourite things: chocolate brownies, baked cheesecake, and raspberries. When I first tried a slice of this from the London store many, many years ago (gosh... it's been so long since uni), I feel completely in love with it. So when my friend, Jimmy, came back from a holiday in the States with a copy of the Hummbingbird Bakery Cookbook for me, it was the first thing I searched for. And lo, there it was!

It's a simple enough recipe to whip up on a night in, assuming you have all the ingredients on hand. So turn on the telly, watch a couple episodes of The Voice, and bake away! Yes, that's exactly what I did on Saturday night after attending a friend's wedding with my boyfriend, and I can't think of a better way to spend a night in.

Raspberry Brownie Cheesecake
from The Hummingbird Bakery Cookbook

Brownie ingredients:
  • 200g chopped dark chocolate
  • 200g unsalted butter, softened
  • 250g confectioner's sugar
  • 3 eggs
  • 110g all purpose flour
Cheesecake ingredients:
  • 400g cream cheese
  • 150g confectioner's sugar
  • 1 tsp vanilla extract
  • 2 eggs
Raspberry cream ingredients:
  • 300ml whipping cream
  • 100g confectioner's sugar
  • 150g fresh raspberries, plus extra to decorate
  1. Preheat the oven to 180°C and line a 9x6 baking tin
  2. Melt the chocolate over a bain-marie, and while waiting for that, beat the butter and sugar in a large bowl. Beat the eggs in, one at a time, then incorporate the flour and mix on medium speed. Pour the chocolate in and gradually increase speed to get it all combined. Pour the batter into the prepared tin and set aside.
  3. To prepare the cheesecake layer, put the cream cheese, sugar, and vanilla in a large mixing bowl and beat until creamy, then add the eggs one at a time and increase speed of the mixer to ensure everything is mixed thoroughly. Spread the batter over the brownie batter, then bake for 35-40 minutes until the edges are golden. Remove from the oven and let it cool to room temperature before refrigerating for at least 2 hours (I like to leave it overnight at this point and finish in the morning)
  4. When ready to serve, prepare the raspberry cream. First chill your mixing bowl and whisk attachment in the freezer for 5 minutes (I can't remember where I learned this trick, but have always done it for whisking cream). Whisk the cream and sugar until stiff peaks form, then whisk in the raspberries. Spread or dollop the raspberry cream over the brownie cheesecake, and serve with fresh raspberries! 

Saturday

Raspberry Cheesecake


I initially wrote a blog post about friendship, loyalty, and honesty. But you lot don't really care about that, so I'm just going to go straight to this week's recipe share: baked raspberry cheesecake. 


Raspberry Cheesecake

For the crust:
  • 200g digestives
  • 100g butter, melted
  1. Grease & line a 7" springform tin with parchment paper
  2. Combine the crushed biscuits and melted butter in a medium bowl and then pour into the prepared baking tin and press up the sides and the bottom
  3. Cover with a clean cloth and refrigerate the crust for at least 10 minute
For the cheesecake filling:
  • 450g Philadelphia Cream Cheese, cold
  • 3/4 cup caster sugar 
  • 1/4 cup + 2 tbsp milk, room temperature
  • 2 eggs
  • 1/2 cup sour cream, room temperature
  • 1 tsp vanilla extract
  • 2 heaped tbsp all purpose flour
  • 300g (roughly 1 1/2 cup) fresh raspberries
  1. Pop the cream cheese and sugar in a large mixing bowl, beat until it blends into a smooth mixture then gradually add the milk and continue to beat 
  2. Beat the eggs in one at a time, and make sure to scrape the sides and bottom of the mixing bowl with a spatula to ensure it's all mixed properly
  3. Add the sour cream, vanilla extract, and flour in one addition and beat until thoroughly combined
  4. Take the tin with the crust out of the fridge, wrap it with tinfoil and place the tin in a larger roasting tray or baking tin 
  5. Pour the cheesecake filling into the springform tin about 1/3 of the way up and scatter fresh raspberries, cover with more filling, and scatter more raspberries, repeat until all the filling has been poured in
  6. Pour hot water into the larger roasting tray/baking tin until it comes up to about 3/4 of the springform tin with the cheesecake inside
  7. Carefully transfer the entire thing to the oven and bake for 1 hour and 30 minutes, then leave the cake inside the oven until the oven has cooled. Remove the cake when that's done, and cover it with a clean cloth and leave it in the fridge overnight to set 
For the topping:
  • 150ml thickened cream
  • 2 tbsp sifted confectioners sugar
  • 1/2 tsp vanilla extract
  • Raspberry coulis (see below for recipe)
  1. Whisk the cream until soft peaks form, then add the sugar and vanilla extract and whisk until slightly firmer. Don't overbeat or you'll end up with sweet butter
  2. Pipe out some pretty swirls around the edges of the top of the cheesecake, then cover the top with the remaining cream
  3. Spoon out some raspberry coulis over the top of the cream
  4. Refrigerate until ready to serve
Raspberry Coulis
  • 250g fresh raspberries
  • 1/4 cup brown sugar
  • 1/2 tsp vanilla extract
  • 1/2 cup water
  1. In a saucepan, bring the raspberries, sugar and water to a boil. Simmer until the fruit is mushy then stir in the vanilla
  2. Remove from heat, allow it to cool then pour it all into a blender and whizz to a puree
  3. Strain the puree through a sieve, then slather your cake layers with the goop

Monday

Black Forest Cheesecake


First of all, please play the following track http://youtu.be/NucJk8TxyRg

Okay, now that the mood has been set, lets get to it.


I baked this silky-smooth Black Forest Cheesecake last week. My family loves Black Forest chocolate from Cadbury and I've always wanted to put it in cake form, so thanks to the year end holidays, I finally had that opportunity! I'll save some time and go straight to the recipe share for this week:

Black Forest Cheesecake
7" Springform Tin
Preheat oven 180°C

For the crust:
  • 200g Oreo biscuits, filling removed and biscuits crushed
  • 100g butter, melted
  1. Grease & line a 7" springform tin with parchment paper
  2. Combine the crushed biscuits and melted butter in a medium bowl and then pour into the prepared baking tin and press up the sides and the bottom
  3. Cover with a clean cloth and refrigerate the crust for at least 10 minute
For the cheesecake filling:
  • 170g dark chocolate chips, melted & cooled
  • 450g Philadelphia Cream Cheese, cold
  • 3/4 cup caster sugar 
  • 1/4 cup + 2 tbsp milk, room temperature
  • 2 eggs
  • 1/2 cup sour cream, room temperature
  • 1 tsp vanilla extract
  • 2 heaped tbsp all purpose flour
  1. Melt the chocolate chips in a bowl in the microwave for 30 seconds, take the bowl out and stir with a spoon until smooth
  2. Pop the cream cheese and sugar in a large mixing bowl, beat until it blends into a smooth mixture then gradually add the milk and continue to beat 
  3. Beat the eggs in one at a time, and make sure to scrape the sides and bottom of the mixing bowl with a spatula to ensure it's all mixed properly
  4. Slowly pour in the cooled melted chocolate, continuously beating the mixture 
  5. Add the sour cream, vanilla extract, and flour in one addition and beat until thoroughly combined
  6. Take the tin with the crust out of the fridge, wrap it with tinfoil and place the tin in a larger roasting tray or baking tin 
  7. Pour the cheesecake filling into the springform tin and smooth it out (or draw heart shapes with your spatula) 
  8. Now here's the move that will literally make or break your cheesecake (no, seriously, don't skip this if you don't want cracks in your cheesecake): Pour hot water into the larger roasting tray/baking tin until it comes up to about 3/4 of the springform tin with the cheesecake inside (this is a water bath, and people make a huge deal about it like it takes so much effort but it really takes 2 minutes and truly makes a huge difference in ensuring the success of your cheesecake)
  9. Carefully transfer the entire thing to the oven and bake for 1 hour and 30 minutes, then leave the cake inside the oven until the oven has cooled. Remove the cake when that's done, and cover it with a clean cloth and leave it in the fridge overnight to set 
For the topping:
  • 150ml thickened cream
  • 2 tbsp sifted confectioners sugar
  • 1/2 tsp vanilla extract
  • Cherry pie filling
  • Fresh cherries for decorating
  1. Whisk the cream until soft peaks form, then add the sugar and vanilla extract and whisk until slightly firmer. Don't overbeat or you'll end up with sweet butter
  2. Pipe out some pretty swirls around the edges of the top of the cheesecake, then cover the top with the remaining cream
  3. Spoon out some canned cherry pie filling (I used Duncan Hines for this) on top (within the swirly edges) 
  4. Refrigerate until ready to serve

2 am Water Baths

I have made approximately two cheesecakes in my life, with one successful biscuit crumb base, and the other turning a little too toasty (as I wasn't even supposed to set the base in the oven for that recipe). Last week I received an order from a colleague for a classic cheesecake for her sister's birthday, an order I couldn't refuse  as I've had this other recipe on hold for a few weeks now. 
New York Cheesecake, one of my favourite cakes, and definitely one of the most beautifully decadent desserts one could order. What makes New York Cheesecake different from other non-regionally-tied cheesecakes? According to the ever trusty (LOL, right) Wikipedia, New York cheesecake relies upon heavy cream or sour cream. In my case, it was sour cream. 
The only problem with the recipe I'm about to share with you is that it's meant for to produce a very tall, 9-inch cake. The order I received was for a 6-inch cake, which left me with enough batter for an identical 6-inch cake AND an 8-inch square cake! 
Two cheesecakes at home during the weekend does a body good. Not. Forget munching on toast and honey for my movie-watching snack! I just gave up and cut myself a massive wedge of cake, digging into it throughout a rerun of Hancock. I also told myself I'd make it up with an extra lap in the pool... which would have been great had I even gone to the pool... 
Alright, enough of the guilt-ridden soliloquy, let's get on to the recipe and slightly complicated process of making a New York cheesecake.
First of all, before you get excited and start mixing up ingredients, here are a few tips from seasoned bakers on producing the perfect cheesecake:
  • Ensure all wet ingredients are at room temperature, so take everything out of the fridge 30 minutes earlier
  • If you didn't heed the above advice and now find yourself with too-hard cream cheese, place the unwrapped cream cheese in a microwave safe bowl and microwave on high for 15 seconds
  • Do not over mix the filling, just mix until combined
  • Use a springform pan
  • Butter the sides of the pan, or run a butter knife around the edges of the cake immediately after removal from the oven
  • Prepare a water bath to keep the oven (and therefore your cake!) moist. You do this by wrapping the springform pan in tin foil (under and around the sides), then placing the pan into a bigger pan which you will then fill with boiling water halfway up the sides of the springform pan
  • Do not open the oven door at any point, if you want to check if it's set, then shake the oven door gently to see if the cake jiggles
  • Perfectly baked cheesecake should be puffy around the edges (try to avoid it turning brown and hard), and then you shake the oven, only the very centre of the cake should jiggle slightly (gawd, I love saying jiggle)
  • When the above point happens, switch off the oven, but don't open the door, and leave it in until the oven has cooled (or for roughly another hour)
  • Cool completely on a wire rack before popping in the fridge to set overnight 
And now, my dear friends, on to the amazing recipe! 
New York Cheesecake
by ouncesandgrams.tumblr.com
First, preheat the oven to 175C, and prepare your springform pan and create a seal for the water bath (ie foil)
Crust
  • 200g cookie crumbs
  • 1/4 c caster sugar
  • 114g melted butter
  1. Blend the cookies - I used McVites plain digestives - into fine crumbs, then combine all ingredients in a bowl
  2. Press into the bottom of the prepared pan, bake for 10 minutes or chill in the fridge while preparing the filling
Cake filling
  • 900g cream cheese
  • 1 1/2 cup caster sugar
  • 3/4 cup milk
  • 4 eggs
  • 1 cup sour cream
  • 1 tbsp vanilla extract
  • 1/4 cup all purpose flour
  1. Cream the cheese and sugar until smooth
  2. Beat in milk
  3. Then add the eggs one at a time, beating after each addition
  4. Beat in sour cream, vanilla and flour until just incorporated. Do not overmix
  5. Pour the filling over the prepared crust, fill the roasting pan (the larger pan which you place the springform pan in) with hot water about 1/2 way up the sides of the springform pan
  6. Bake for an hour or until just barely set
  7. Turn off the oven, leave the cheesecake in until the oven is cool, then remove and cool completely on a wire rack, after which you refrigerate overnight so it's completely set

Saturday

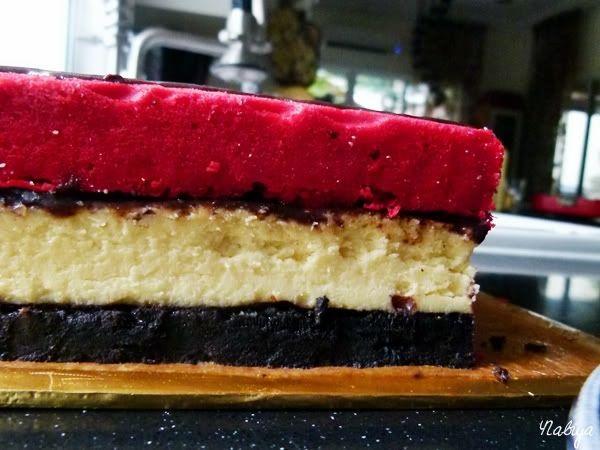
Cheesecake, Oreos, Red Velvet, and me

I go through these phases of voluntary solitary confinement every few years, the last one being when I was doing my A levels. I had gone the entire summer holiday between AS and A2 not calling a single friend, read an average of 20 books a week, watched SO much tv, and spent most of those three months cooped up in my room, playing on SnitchSeeker. That was a bit drastic, and yet, when the semester began, I just picked up where I left off with my friends (them knowing me far too well) and re-entered "reality".
It seems as if I may have hit the hermit stage again. Not that I don't want to see my friends - I do - but it's rather the fact that I sort of really enjoy my own company and doing what I like to do, which unfortunately are mostly... activities that you do alone (reading, internet surfing, watching tv, baking, fangirling One Direction, etc), and only a certain set of people (usually us internet nerds) enjoy... 
My preferred form of socialising these days are confined to places where I can hear my friends speak so that I may actually have quality time with them, where the lights are steady and do not come with a disclaimer for causing epileptic shock, and where I can be home with enough time to still have a conversation with my family before I start getting ready for bed. 
I think it's just a side-effect of growing older. Meh. 
Anyway, despite all this, I was quite looking forward to catching up with some friends and colleagues at a Bistro in town last night. Had even washed my hair, applied concealer and blush, and put on a fresh outfit! But my dad called, saying him and mum had to go for some networking thing, and needed me to pick up my siblings and grandma at my aunt's in town. Now... I'm not one to say no to my father, even though I explained to him that I had made plans, and that these instructions would disrupt everything. We tried to find an alternative, but in the end, suffice to say, I scrubbed my face clean and changed into PJs. 
To then soothe my grumpy mood at having one of my rare nights out disrupted, I decided to attempt this recipe that I have been dying to try for a few weeks now. I had initially planned on baking it as a round cake for my parents on Valentine's Day, but that didn't happen, so this time I decided to bake it in a square pan... as I liked the cheesecake bar concept I did for the Berry Cheesecake Bars previously. 
So for those of you who are staying in this weekend, why don't you try this recipe out and see if it helps to improve your mood as much as it did with me?
Photobucket
Red Velvet Cheesecake Recipe
Adapted from Willow Bird Baking
Biscuit Base
  • 24 Oreos, processed or stuffed-in-a-ziploc-bag-and-smashed-with-a-rolling-pin into crumbs
  • 5 1/2 tbsp butter, melted and cooled
  1. Preheat the oven to 160C and grease and line your baking pan with butter and parchment paper
  2. Combine the crumbs and butter, then pour into the pan. Press down with the bottom of a glass for an even and firm base
  3. Bake for 10 minutes, then remove from the oven and set aside
Chocolate Ganache (x2)
  • 2oz bittersweet chocolate, finely chopped
  • 1/4 cup heavy whipping cream
  • 2 tbsp confectioners sugar
  1. Combine all ingredients in a bowl and microwave on full heat for roughly 20 seconds, take it out and stir to mix properly
  2. Pour the ganache over the biscuit base, leveling with a spoon, then put it in the freezer for at least 30 minutes
Cheesecake Filling
  • 24oz cream cheese, softened
  • 1 cup caster sugar
  • 1 1/2 tbsp all purpose flour
  • 2 tsp vanilla extract
  • 3 large eggs
  1. Beat the cream cheese and sugar in a large mixing bowl until light and fluffy
  2. Add the flour, beat and scrape side of bowl as necessary, then add the vanilla
  3. Beat in the eggs one at a time
  4. Pour the filling over the biscuit and ganache base in the pan, then bake for 35-45 minutes, or the middle just jiggles gently when the tin is shaken
  5. Cool at room temperature for 30 minutes to an hour, then chill in the fridge for at least 3 hours to set
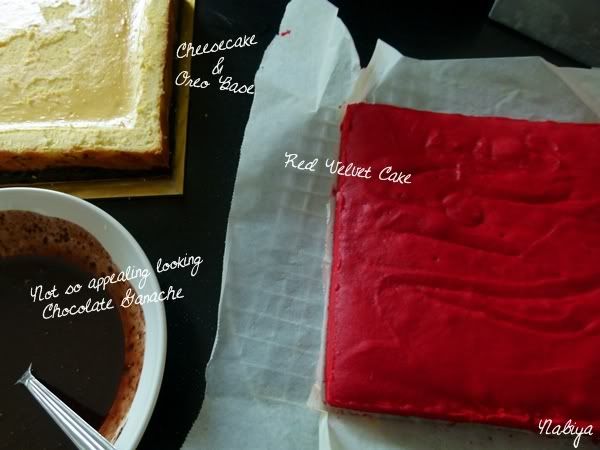
Red Velvet Cake
  • 1/4 cup vegetable shortening
  • 1 egg
  • 3/4 cups sugar
  • 1 tablespoon cocoa
  • 1 ounce red food colouring 
  • 1/4 teaspoon salt
  • 1/2 teaspoon vanilla
  • 1/2 cup buttermilk
  • 1 1/4 cups flour
  • 1/2 teaspoon baking soda
  • 1/2 tablespoon distilled white vinegar
  1. Preheat the oven to 180C, butter and line the pan with parchment paper for ease of removing later
  2. Cream the shortening, egg and sugar until fluffy
  3. In a small bowl, mix the cocoa and colouring into a paste, then mix this into the shortening mixture
  4. Beat in the salt and vanilla, scraping the side of the mixing bowl as necessary to ensure all current ingredients have been mixed evenly
  5. Add the flour and buttermilk, alternating so that you begin with adding flour, then buttermilk, and end with flour
  6. Combine baking soda and vinegar in a small bowl and fold into the batter 
  7. Pour into prepared pan and bake for 30 minutes, or until a skewer poked through the cake at an angle comes out clean. Allow to cool completely on a cooling rack
Photobucket
Assembling the cake
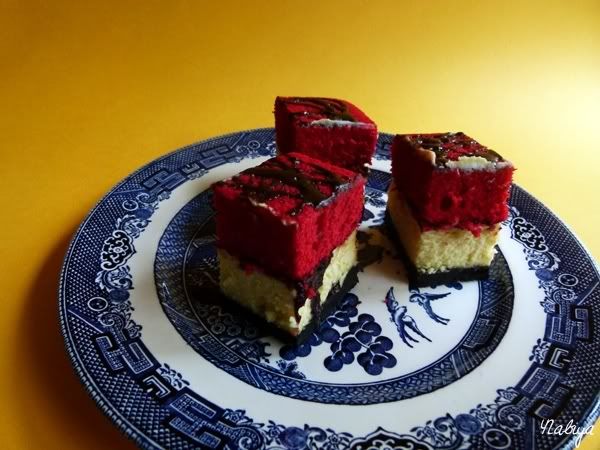
The biscuit base, ganache layer, and cheesecake should already be in one pan. Carefully remove from the pan, and place on a cake board or serving platter. Apply another layer of chocolate ganache over the top of the cheesecake, then place the red velvet cake top-side-down on top of the cheesecake. Cut with a long serrated knife as necessary to ensure the sides match up. 
Optional: Drizzle with remaining ganache
Photobucket
I didn't add too much ganache or cream cheese frosting (as indicated in Willow Bird Baking's recipe) as this cake is far too rich on its own. But that's your prerogative! 
Much love,
Nabs

Wednesday

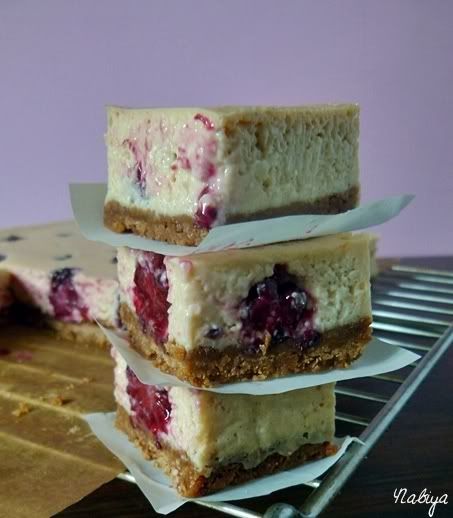
Berry Cheesecake Bars

Photobucket
Meet my Valentine. This is Berry Cheesecake Bar, and unlike the usual horrors that come with my past Valentine's day overly-expensive dinners and bouquets, this little baby was fuss free, had no expectations of me, and was a damn good time.

Forever Alone, level 12. LOL.

This was the first time I attempted a cheesecake, and a biscuit base that didn't crumble into pieces when I touched it. The feeling I got when I woke up this morning was something akin to the feeling I usually get on Christmas morning, though more intense. I rushed through my getting-ready-for-work process (dumped necessary make up in my handbag so I could apply en route) so I could run downstairs and snap some pics while the light was working with me.

By the way, I've decided 9am sunlight is the best for food photography.

Pulling the cheesecake out of the pan was the most daunting experience, waiting to see if it had set nicely, and if it would even work! But when it just slid out, and I laid it down on the table, I think I might have fallen in love a little bit. What a beautiful, beautiful cake, and I'm so incredibly relieved that it was a success! Who knew cheesecake could be so easy?

I cut up half of the cake and brought it into work today. It's already gone, and seems to have gotten good reviews... though I'm not sure if people are just being nice. I don't mind though, I'm a fan of these bars!

Berry Cheesecake Bars
Recipe adapted from Epicurian Mom


Raspberry Puree
  • 9oz fresh raspberries
  • 2 tsp caster sugar
  • 1 tsp lemon juice
In a small saucepan over medium heat, cook down all ingredients and stir occasionally, for about 10 minutes. Allow the mixture to cool before pouring through a sieve. Set the juice collected aside to cool

Biscuit Base
  • 10 chocolate digestives
  • 1/4 tsp salt
  • 1 tbsp sugar
  • 5 tbsp butter, melted
  1. Preheat the oven to 160C, grease the 9x9 pan, line with parchment, then grease again. Set aside
  2. Crumble crackers in a food processor if you have one, mine broke, so I just put the biscuits in a ziploc bag and whacked the biscuits with a rolling pin. Anger management, I have it. 
  3. If using my archaic method, transfer crumbs to the mixer bowl and blitz for a bit with the beater, then add all remaining ingredients and beat until incorporated
  4. Pour into lined baking pan, and use the bottom of a glass to firmly pat down biscuit base. Bake for 12-15 minutes then take it out and set aside
Cheesecake filling
  • 16oz cream cheese, softened
  • 1/2 cup caster sugar
  • 2 eggs
  • Raspberry puree
  • 1 cup fresh blackberries
  1. Combine all ingredients (except for blackberries) and whisk on medium until well combined
  2. Pour on cracker crust, and arrange the blackberries into the filling
  3. Bake for 35-45 minutes, until set and the middle jiggles slightly when shaken gently
  4. Cool for one hour, then cool in the fridge for at least three hours

Thursday

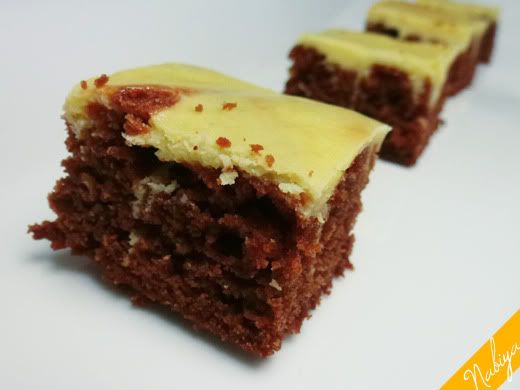
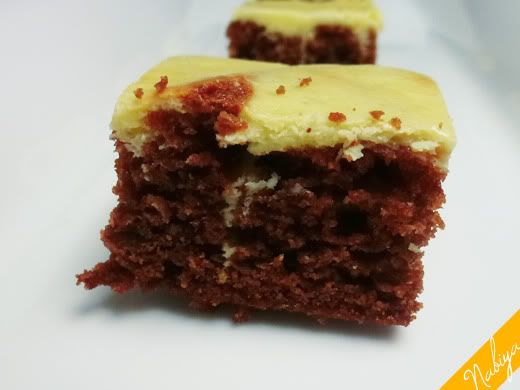
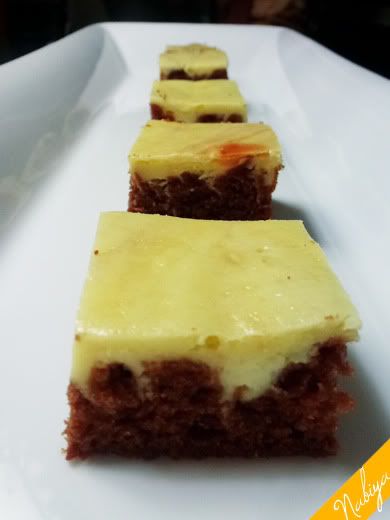
Brownie Cheesecake

Photobucket
My best-friend, Jess, is surprisingly quite fussy with her food. I assumed she was very much like me, where I am willing to eat almost anything (lol) but I've learned in the past few months that there's a lot of things I like, that she can't stand! I am now keeping a list of things she doesn't like, so that I can avoid making them for her in the future.
Food Jess Doesn't Like:
  • Duck
  • Peanut butter
  • Any cake that isn't chocolate or cheese (she can take banana bread)
  • Onions
Trust me, that list is going to grow. I found out a couple of these things after I'd baked her things, and so... I am now determined to give her dessert that she will actually eat and enjoy for once!
I planned on baking her a banana brownie cheesecake last weekend, and I did, but I haven't taken pictures of those yet. In any case, I also baked a plain chocolate brownie with cheesecake topping (I think I can do without the banana in my brownies).
The recipe is simply a combination of my basic brownies, and basic cheesecake:
Photobucket
Brownies
  • 4 oz dark, unsweetened cooking chocolate
  • 1/2 cup of unsalted butter
  • 1 cup sugar
  • 2 large eggs
  • dash of vanilla
  • 1 cup flour
  • 1 tsp baking powder
  • Pinch of salt
Cheesecake topping
  • 8 oz cream cheese, softened
  • 1 egg
  • 1/3 cup of sugar
  1. Preheat the oven to 180 C and prepare your pans by lightly greasing only the bottom
  2. Melt the chocolate and butter in a double-boiler (heat-proof bowl a pot of water), stir constantly so it doesn't burn
  3. In a medium sized bowl, sift the flour, baking powder and salt together
  4. Once the chocolate and butter is smooth, remove from heat and transfer to a large mixing bowl
  5. Add in the sugar and vanilla, and whisk until nicely combined
  6. Stir in the eggs, one at a time and whisk well after each addition
  7. Add the flour mixture and mix until well integrated and the brownie mixture is smooth
  8. Pour into prepared pan (I used a 9 x 6 pan for this batch)
  9. In a separate bowl, mix the cream cheese, egg and sugar. Once fully mixed and smooth, pour the mix over the brownie mix in dollops and swirl with a butter knife (I didn't swirl very well, so it didn't turn out quite as nice)
  10. Bake at 180 C for 30 minutes, or until the sides begin to pull from the pan (I like to leave it in a little longer cos I prefer my brownies at a good cake-y texture)
Photobucket
All I can say is, I ended up with a rather thin layer of cream cheese topping, probably due to the fact that my pan was far too large for the amount. Oh well, practice makes perfect.
Enjoy!
x Nabiya