Showing posts with label Wilton. Show all posts

Sunday

Hummingbird Bakery's Red Velvet Cupcakes

I had a go-to red velvet recipe, one I thought I was happy to use for the rest of my life... but then I went to London last October, bought a red velvet cupcake from the Hummingbird Bakery on Portobello... realised I have their recipe book at home, decided to try it and have not turned back since. Their cream cheese frosting recipe is also the one I've been using for years now, so it truly is a perfect pairing!


There were many birthdays in my family this week, and a special one in the manfriend's family... and also I kinda had a craving for a red velvet cupcake (clean eating begins MONDAY!). So, following a terribly self-indulgent Saturday morning, I decided to whip up a few batches of these little babies.

Don't they look pretty? My baby boomer dad surprised me by splitting the cupcake in half and eating it like a cupcake sandwich. Who knew he subscribes to Lifehack pinterest board advice?


Anyway, for those of you still on the hunt for the perfect red velvet cupcake recipe, look no further. The Hummingbird Bakery's recipe is definitely the way to go.

Red Velvet Cupcake
Yield: 12 cupcakes
  • 60g unsalted butter, at room temperature
  • 150g caster sugar
  • 1 egg
  • 20g cocoa powder
  • 30ml red food colouring
  • 1 tsp vanilla extract
  • 120ml buttermilk
  • 150g all purpose flour
  • 1/2 tsp baking soda
  • 1 1/2 tsp white vinegar
  1. Preheat the oven to 180°C and prepare your cupcake liners
  2. Cream the butter and sugar in a large mixing bowl until fluffy, then add the egg and beat until fluffy
  3. In a small bowl, mix the cocoa powder, red food colouring, and vanilla into a thick paste then add it to the butter mixture, beating well to incorporate
  4. Add half the flour, beating until just combined, then add all the buttermilk, mixing well before adding the rest of the flour
  5. Last step, add the baking soda and vinegar and beat until just combined before dividing the batter into the cupcake liners. Fill the liners 2/3 of the way up, then lower the oven temperature to 165°C and bake for 25 minutes
  6. Allow the cupcakes to cool for 5 minutes into the cupcake tins before removing to a wire rack to cool completely. You may, like my brother and boyfriend, prefer to eat these without frosting... but for the purists who believe that red velvet cake must be eaten with cream cheese frosting, decorate as you will with this cream cheese frosting. I used a Wilton 1M tip to decorate with these darling little swirls. 

Monday

Buttercream Ruffles

Buttercream and I have a love-hate relationship, in that I love that it doesn't taste like fondant (yuck), but I hate that sometimes it's too sweet and clumps up in my decorating tips. But now that I've figured out just how easy Swiss Meringue Buttercream (SMB) can be, I'm never going back to that sugar-heavy concoction of artery clogging mess.

I received an order for a wedding cake that needs to be done and delivered in the coming weeks. The bride wants a ruffle cake, but using buttercream instead of fondant, and she wants it in shades of pink, and though she didn't specify this... I had better damn well make sure that it's tasty! So taking into consideration the humidity of the local climate, I need to pressure test my SMB!

First of, 2 weeks before the order date, I'm working on perfecting my decorating. Buttercream ruffles are easy enough when you have the right frosting consistency, and the right tools, but my shaky hands definitely need some practice before I go on to the big leagues. And sure enough, this practice cake I did for my friend's birthday came out a bit off the mark of what I'm aiming for with the wedding cake. I've made a list of things to improve, such as gaps, angles, closures and joints *facepalm* basically everything.

It's still pretty though, so I thought it's worth sharing. I used the SMB recipe posted below, and this chocolate cake recipe. I filled it with seedless raspberry preserve to counter the chocolate and buttercream, and used a Wilton #104 tip to create the ruffles. Tip: sit down and get on eye level with that sucker, cos it's gonna be a pain to get the angle right when you're standing over it. Also, get a rovolving cake decorating stand (I got mine for so cheap! Woohoo!) cos it's a lifesaver.

Swiss Meringue Buttercream
Enough for a thin crumb coat on a 3 layer-6 inch cake, and to decorate entire cake
  • 1/2 cup caster sugar
  • 3 large egg whites
  • 220g butter, room temperature and cut into cubes
  • 1/2 tsp vanilla
  1. In a heatproof bowl over a saucepan of boiling water with the heat on medium-low, heat the sugar and egg whites, whisking gently to ensure all the sugar is dissolved. I don't use a thermometer, so to test that the egg whites are cooked, just rub some of the mixture out of the bowl between your fingers. The point where all the sugar has dissolved also indicates that the eggs are cooked
  2. Transfer the meringue mixture into your large mixing bowl and using the whisk attachment, whisk until the bowl is cool to the touch and the meringue has formed stiff and glossy peaks, roughly 10 minutes (might be more depending on the humidity)
  3. Add the butter, one tbsp at a time, while whisking on medium speed. Keep adding until it's all in, then whisk in the vanilla until smooth
  4. Use as is, or separate into 4 bowls and colour in increasing shades by adding a drop of colour at each time. Start from the lightest shade to the darkest

Friday

Wilton's baked doughnuts with cinnamon sugar glaze

I had my aunt round for tea a few days ago and was messing about in the kitchen with all my baking utensils and decorative plates when I realized (quite belatedly) that there was a recipe on the packaging of the doughnut pan! Well, duh, Nabiya, it was right next to the pricetag... Which, I'm sure I looked at when I bought the damned thing.

I won't even pretend to have a reason for baking these days, as I seem to take selfish pleasure in doing it. It is oddly relaxing, my solitary place, and seems to make people around me happy (discounting the handful who whinge about their calorie-intake, yet still continue to eat the goodies). In this past year, I've found so much comfort in baking, and I suddenly feel like I have something to be passionate about. It feels damned great to find one's calling.

I digress, nobody cares about my strange love affair with desserts, let's get on with the recipe:

Wilton's baked doughnuts recipe
Yield: approximately 12
  • 2 cups all purpose flour
  • 3/4 cup caster sugar
  • 2 tsp baking powder
  • 1/4 tsp ground nutmeg
  • 1 tsp salt
  • 3/4 cup buttermilk
  • 2 large eggs, lightly beaten
  • 1 tsp vanilla
  • 2 tbsp butter, melted
  1. Preheat the oven to 180C, grease your doughnut pan and set aside
  2. In a large mixing bowl, combine the flour, sugar, baking powder, nutmeg and salt
  3. Add the eggs, vanilla, buttermilk and melted butter and beat until just incorporated (I did the whole thing by hand, you may choose to use an electric mixer if you wish)
  4. Pour all the batter into a piping bag for ease of filling the pan, cut a hole around the circumference of your pinky fingertip, and fill the doughnut pan 2/3 of the way up
  5. Bake for 7-9 minutes or until the top of the doughnuts spring back up when lightly pressed with a finger
  6. Cool for 3 minutes in the pan then pop them out to cool on a wire rack

Cinnamon sugar glaze
  • 2 tbsp fine granulated sugar
  • 1 tbsp cinnamon powder
  • 2 tbsp butter, melted
  1. Mix the sugar and cinnamon in a bowl
  2. In a separate, flat bottomed bowl, melt the butter
  3. Dip the doughnuts in the butter, then roll around in the cinnamon sugar
  4. Serve immediately if possible as baked doughnuts are SO good when warm and fresh from the oven
My family quite enjoyed these, and I'm getting a craving for one from just typing up this post! If you get yourself a doughnut pan, I insist that you give these a shot. I made minor tweaks, as I have no cake flour and I added vanilla as I dislike the eggy taste you sometimes get.

Happy Friday, friends, and enjoy your baking weekend!

Much love, Nabs

Sunday

Weekend in a White Garden

Photobucket
What do you get when you combine a simple white cake with fluffy lemon buttercream frosting?
Cellulite.
LOL just kidding (but not really), you get a cake, silly!
During the week, I find myself inexorably drawn towards cooking sites and the cooking sections of the bookstores. I now realize that what I've been doing is storing recipes and getting ideas for what I can bake during the weekends! So this week, I decided I wanted to try a simple white cake as I've never tried one that didn't come out of a box before.
Photobucket
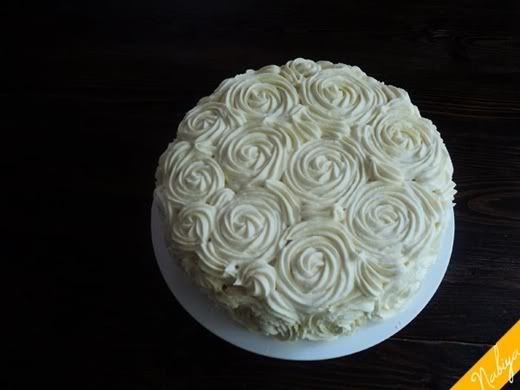
I was also so inspired by Amanda's (from iambaker) rose covered cake that I decided I wanted to give it a shot. My experience with frosting is (as previously stated) very limited, and as such I don't own much equipment for decorating cakes and the such. Fortunately, last week I stumbled upon this amazing store in town called the "International Centre of Cake Artistry". This store supplies everything and anything I could possibly think of using for baking.
This, of course includes a Wilton 1M tip. Let's just leave it at that for now, I don't really feel like telling the internet (which might include my mum) what I bought.
The best thing about having a very large extended family is the fact that there is a birthday to celebrate almost every other week. This might come as a pain if you're one of those people who buy stuff for others, but it's a godsend when you just need an excuse to BAKE. So this week's cake is for the one and only Indera, my beloved cousin who turned 23 on the 18th of May (same as my brother Adam, of last week's cake). You know I don't mean that, Ind, I love you and felt I owe you cake... even if it's not the flavours you mentioned last week.
My roses didn't turn out as beautifully as Amanda's did, of course, as she is a Goddess and I am still a novice. But I had SO much fun doing this!

Basic White Cake
  • 1 cup white sugar
  • 1/2 cup butter (softened, do NOT let it get too liquidy)
  • 2 eggs
  • 2 tsp vanilla extract
  • 1 1/2 cup all-purpose flour
  • 1 3/4 tsp baking powder
  • 1/2 cup milk
  1. Preheat oven to 175 degrees Celsius, grease and flour your baking tray (overdo this bit)
  2. Cream together sugar and butter
  3. Beat in the eggs, one at a time, then stir in the vanilla
  4. Combine flour and baking powder, add to creamed mixture and mix well
  5. Stir in milk until batter is smooth and fluffy
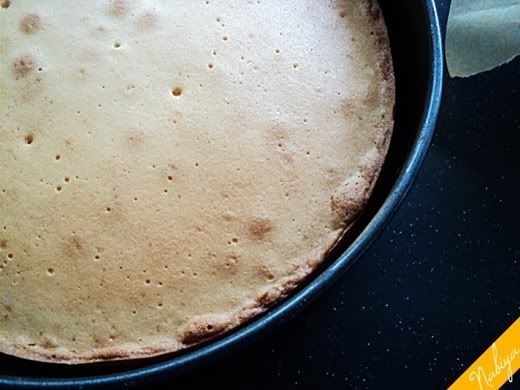
  6. Pour batter into pan
  7. Bake for 30-40 minutes, or 10-20 minutes for cupcakes, or until you poke a stick through the cake and it comes out clean
Lemon Buttercream frosting
  • 2 tbsp freshly squeezed lemon juice
  • 1 tsp lemon zest
  • 4 cups confectioners sugar, sift and sift again
  • 1 cup butter (softened)
  1. Cream the butter until it's fluffy
  2. Add lemon juice and zest, beat well
  3. Gradually add sugar, one cup at a time and continue to beat until creamy
Decorating the cake:

Once the cake is completely cooled - seriously, don't mess with this bit, you make sure that cake is NOT letting off any more heat or your frosting will just melt right off and it's gonna look fug. I had to pop my cake in the fridge for 10 minutes before I could frost mine, cos the humidity here on the Equator does not help with the cooling process. Or the impatience.

Anyhoo, once your cake is cooled and leveled (you don't have to have a very level cake if you don't want to) apply a crumb coating and pop it back in the fridge for a couple of minutes. A crumb coating is just to ensure that any stray crumbs from the cake will be stuck down so it won't come off into your final layer of decoration later.


Attach your Wilton 1M tip, or any large open star tip that you have to your decorating bag (a 16 inch bag should be okay for a 9 inch cake, but it's fine if you don't mind refilling) and fill it with your frosting. I can't possibly describe the method of decorating without sounding like a complete dork (start in the centre and go round and round til you get a cool rose), so I'll leave that to the pro: Check out Amanda's tutorial on this cake.

As you can see, I didn't do so well on the roses on the side of the cake. My first batch of buttercream frosting (yes, I realised I needed two batches for this cake) was a little under the desired consistency (smooth, yet not runny) AND coupled with the fact that it was my first time using the 1M tip and trying to create this rose effect. So the roses are a little shoddy. Also, I didn't space them very well so there's a lot of filler "petals" in there too. Still love it though!

Now I know you're probably thinking "... wait... she didn't mention cupcakes!"

(:

xx Nabs