There has been a particular recipe sitting on my shelf for far too long, and now that I've tried it, I don't quite know what I was so afraid of. I've been terrified of trying Banoffee Pie, or any caramel based recipe, due to the fact that I'm afraid to make caramel.
I can't for the life of me understand why. It's incredibly easy, and oh-so-satisfying to taste the results. Unless you're an idiot like me and taste it right out of the hot saucepan. I'm still waiting for my lip to blister, wondering if it will be so unsightly that I may need to take some days off work. LOL, jokes.
A good friend of mine asked me last week if I can do Banoffee Pie, and I told her the truth: that I've never tried it, but have always wanted to try. She then went on to say that she's got a friend who may be interested in asking me to do the dessert for her wedding! 60 mini Banoffee Pies! Is it silly of me to even try and wish for this gig?
I whipped up (heh, geddit?) a sample for her, and made a test pie to go with it... from my side, the flavour and texture turned out great, and everyone here seems to like it. I just wonder if she'll feel the same. Sitting on tenterhooks here and biting my nails to boot!
But that said, whether or not she goes for my Banoffee Pie, I've not opened up a whole new world for myself! CARAMEL!
Banoffee Pie
Crust
- 250g plain digestives, passionately whacked with a rolling pin into fine crumbs
- 120g butter, melted
Filling
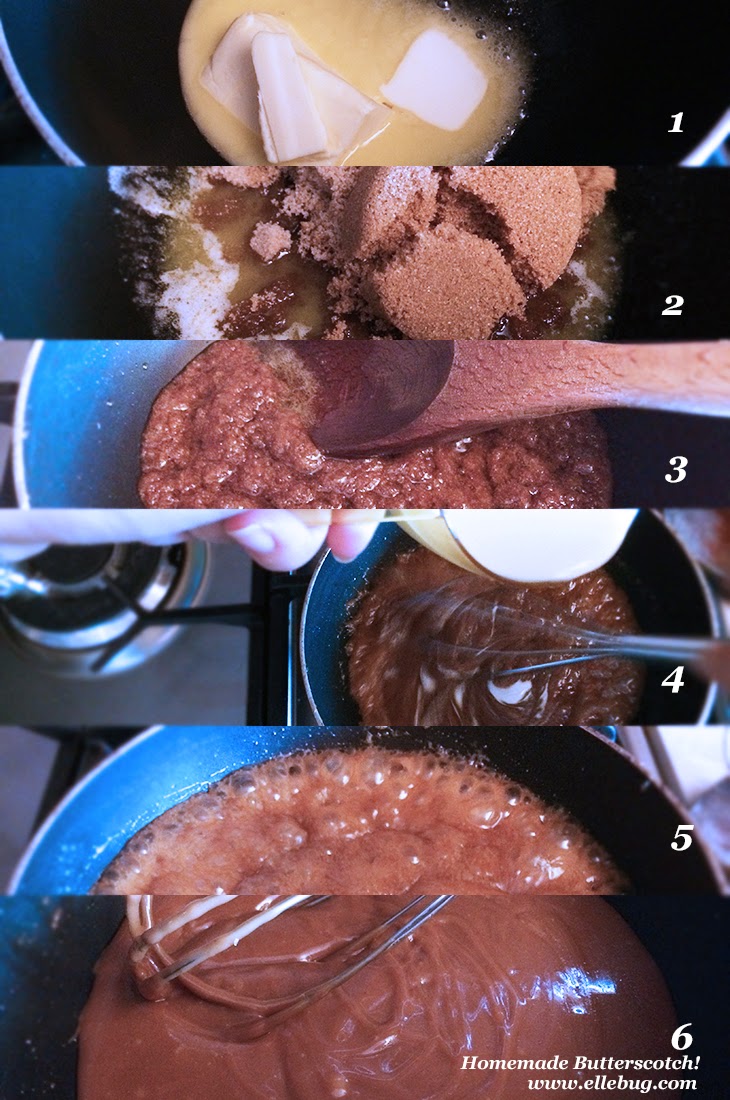
- 100g butter
- 100g soft brown sugar
- 397g condensed milk
Topping
- 3 medium bananas, ripe and soft
- 300ml whipping cream
- To make the crust, mix the digestive crumbs and butter using a fork, then press into the bottom of a lightly greased pan (I used a round tin foil pan for ease of delivery, but springform or removable bottom is ideal). Use the bottom of a glass to firmly pat the crumbs down. Then chill in the fridge while you prepare the filling
- In a non-stick saucepan, gently heat the butter and sugar until the sugar is completely dissolved. Pour in the condensed milk and bring to a boil gently, making sure to stir continuously so the caramel doesn't burn
- Pour the caramel over the chilled crust and smooth it out with a rubber spatula then chill in the fridge for at least 1 hour while the caramel sets
- Just before serving, slice your ripe bananas to cover the caramel
- To make the whipped cream, be sure to chill your bowl and whisk for 2-5 minutes beforehand. Then for a creamy, yet not overpoweringly sweet whipped cream topping, just whisk the cream for around 1 minute (if you're using an electric mixer) or until soft peaks form and you can turn the bowl over and the cream stays intact. Smooth or pipe the cream over the top
- For extra decoration, you can grate some semi-sweet chocolate over the top of the pie, or decorate with slices of bananas

It couldn't be easier, and now I'm dying to make more pies to give away to friends and family members!
x Nabs
P.S. Sorry for the ugly, over-exposed pictures...