

Yes, ambitious, considering I had just three days to do it. I usually don't take such late orders, but since it was for my mother and she was buying everything anyway, I thought I'd give it a shot.
I read every bit of advice I could find on the net, though I admit to not conducting thorough research on the subject. Click on those links for some great cake-making tips though, especially the smitten kitchen link, wowza, is she amazing or is she amazing?
It was actually a lot easier than I anticipated, though I kinda underestimated the height of my cake layers and baked too many. I thought I would need three layers per cake (which would mean a total of nine layers), but when all was said and done... I just needed the basic two. So I had three extra left over in the freezer (show you what I did to them later).
I tried a new recipe for this cake, which is silly. You would have thought I'd learned my lesson not to make new recipes for last minute orders by now, but of course not! I don't have the ability to retain knowledge. It was relatively simple, and turned out quite well! Though not as chocolatey as I had hoped.
Chocolate cake recipe
makes 2 8-inch round pan cakes, or 3 6-inch round pan cakes
- 150g self-raising flour
- 3 tbsp 70% cocoa powder
- 175g unsalted butter, completely softened
- 175g caster sugar
- 1 tsp baking powder
- 3 eggs
- 1/4 cup buttermilk
- Preheat the oven to 180C, grease and flour your pans (I used 2 8-inch round pans, and 3 6-inch round pans)
- Combine all the cake ingredients in a large bowl and beat with your electric mixer on medium speed until all ingredients are fully incorporated
- Pour into the prepared pans and bake for 25 minutes, or until a skewer inserted through the middle comes out clean, allow the cake to cool in the pan for 5 minutes before carefully removing onto a cooling rack where it will cool completely
I baked four batches of this recipe for the cake (though in hindsight, I only needed three), then wrapped them in cling wrap and popped them in the freezer for around two hours while I went out for dinner. When you remove cake from the freezer, you may want to re-moisten the layers with some sugar syrup... or I prefer to use 3 parts hot water, 1 part vanilla essence, and brush it over the layers.
For the filling, I had gotten quite lazy and used raspberry and strawberry preserve (raspberry for the top and bottom layers). The cakes were then covered with the following chocolate buttercream.

- 1/2 cup vegetable shortening
- 1/2 cup butter, softened
- 3/4 cup cocoa powder
- 1 tsp vanilla essence
- 3 cups sifted confectioners sugar
- 3-4 tbsp milk
- Cream the shortening and butter until light and fluffy
- Add cocoa powder and vanilla and whisk into the butter and fully incorporated
- Add sugar, 1/2 cup at a time, beating well after each addition
- Slowly add milk whenever the mixture gets too clumpy
- Add colouring as you wish (I went with 2 tsp of red colouring to give it that shade), and if keeping in the fridge, be sure to allow the buttercream to thaw slightly then re-whip before spreading
For this particular cake, including frosting and the thin crumb coating, I used 1.5 batches of this icing. It turned out quite well, particularly with the bitter-sweet cocoa powder, as it wasn't as sickeningly sweet as I was afraid it might be. I used a Wilton 1M tip and just drew a line from the bottom of the cake all the way to the top. Check out what it looked like once they'd cut into it. Dear lord.
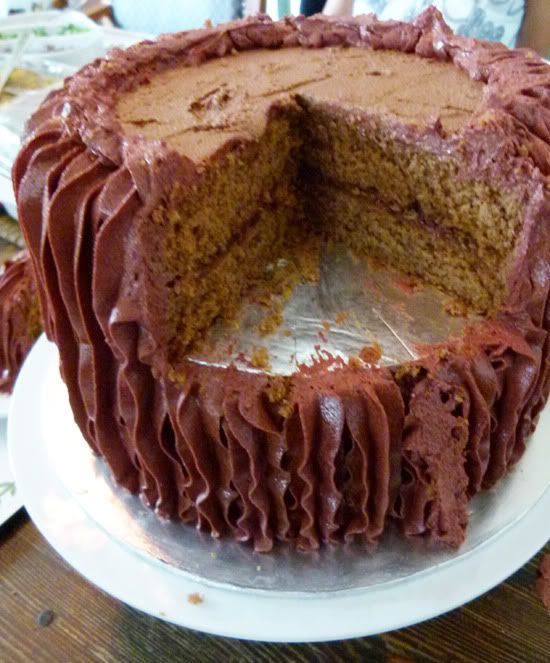
Unfortunately, no matter how careful you are with baking and wrapping and stacking... and as this was my first time... of course my lowest layer didn't match up with the second layer. I had to patch it up with buttercream, which gave me quite a fright... Then there was the whole process with the dowels, and how they wouldn't stay even!
Though luckily, everyone left with only one slice to go on the 2nd tier! I took that lowest layer out to my work area, scooped and smoothed and patted down until all we were left with was the barest layer of frosting. I thought, no, no... I'm tossing the rest of this frosting out, there is no way I'm putting any of that anywhere near my already relentless cellulite. So we ended up with two of these (I whipped out the extra layers from the freezer and scooped up enough frosting from the lowest layer to cover that!):

Those just looked so much more... manageable, to me. The frosting started to scare me a bit, and the longer I stared at it, the more paranoid I became! How on earth was that going to affect my ability to fit into clothes, right?
ARGH. Anyway, enough of all this post-holiday-guilt talk. I'm definitely going to give this stacking business a few more tries, until I get it absolutely perfect! Who knows... I may start using fondant... despite the fact that I hate the taste of it...
Cheers!
Nabs
P.S. Sorry if this post sounded kinda weird, it's just Monday blues, ya know?
No comments:
Post a Comment